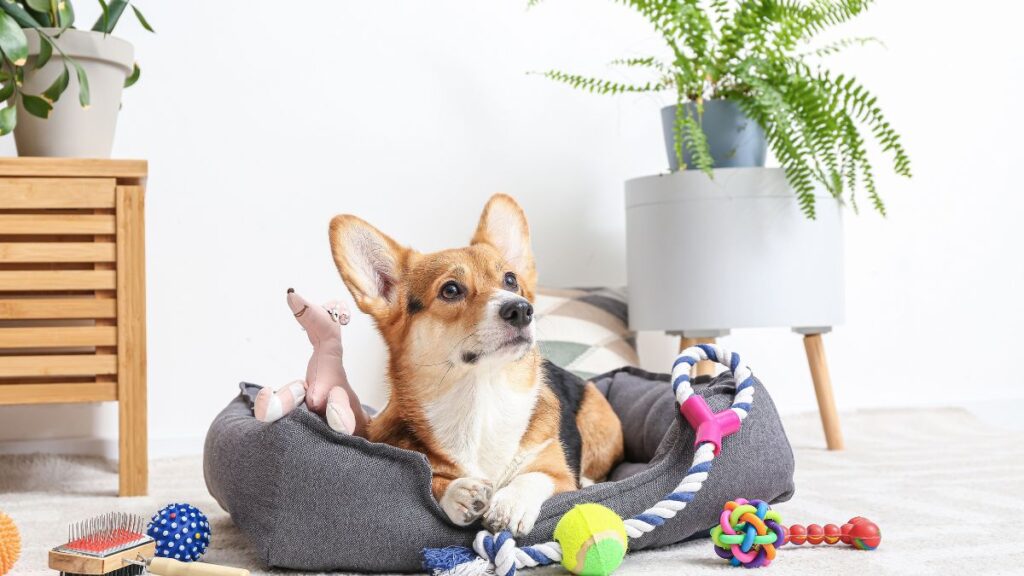
If you share your living space with pets, you know fur and unexpected smells can collect fast. Even after sweeping, pet area cleaning is what truly keeps things fresh and cozy for you and your animals.
Attic Deep Clean
Protect your home from pests and heat loss! Do an attic deep clean with rodent-proofing and insulation checks made easy.
Ignoring these tasks leaves odors lingering and hair finding its way into every room. Smart pet area cleaning keeps your home inviting, supports pet health, and protects your investment in furniture.
Let’s dig into simple, expert strategies for pet area cleaning that bust odors, reduce shedding, and make upkeep stress-free. You’ll find tips here you can use today—wherever your pets roam.
Setting Pet Area Cleaning Routines That Stick
Effective routines make pet area cleaning sustainable day-to-day. Sticking to a schedule means hair and odors never get out of hand—even during shedding season or wet weather.
Pick a daily time, such as right after breakfast, to sweep fur and scan for any pet accidents. The best routines blend with existing habits for easy follow-through.
Choosing Timing Based on Pet Patterns
Observe when your pet sheds, snacks, or naps in their favorite spots. For example, note if hair piles up after a morning walk, or if smells spike after rainy outings.
Set cleaning times a few minutes after these high-activity windows. This targets emerging messes before they spread, requiring just five minutes at each interval for pet area cleaning.
Regular, tiny efforts become automatic, setting you up for a fresher-smelling home with little daily disruption. “I wipe up after Max’s snack every lunch hour now.” Copy this timing and you’ll notice cleaner floors fast.
Mini-Checklists for Rapid Coverage
Post a mini-checklist in your laundry room or garage for reference. A simple three-line list keeps pet area cleaning focused: 1. Sweep fur zones, 2. Wipe bowls, 3. Spritz odor-remover on common spots.
Consistent checks mean you never forget hidden nooks—like under beds or behind crates. Mark tasks with a dry-erase pen, then erase after each round for visible momentum.
Whenever you slip off track, the checklist helps you reset instantly. “Had a busy week? Scan the list and catch up in under 30 minutes.” This cue keeps routines resilient.
| Task | Frequency | Time Needed | What To Do Next |
|---|---|---|---|
| Sweep or vacuum fur | Daily | 5 minutes | Do immediately after pet eats or sheds |
| Wash bedding | Weekly | 20 minutes (plus drying) | Hot wash, air dry in sun for freshness |
| Mop accident spots | As needed | 3 minutes | Use enzyme cleaner for urine odor removal |
| Rotate toys | Weekly | 7 minutes | Soak, rinse, dry; replace broken ones |
| Wipe food/water area | Daily | 3 minutes | Use dish soap or mild vinegar solution |
Neutralizing Odors at the Source Each Day
Every pet area cleaning plan needs a way to stop odors before they travel. Neutralizing scents at the source means less effort masking problems later and fresher indoor air all day.
Target bedding, blankets, and crate pads before smells build up. Spritz with an enzymatic cleaner or odor-neutralizing spray, working the product into fibers and letting it fully air dry before replacing it.
Tackle Litter Boxes with Realistic Steps
Pet owners frequently say, “It always creeps up on me—suddenly, it smells and I can’t remember the last clean.” Set a twice-daily schedule for scooping, even if you think it’s clean.
- Keep a lidded trash bin next to the litter box for instant disposal—removing waste immediately instead of letting smells accumulate.
- Wipe the box’s edge each scoop with a baby wipe so residue can’t build up. This small step cuts down overall odor risk.
- Fully dump and scrub the whole box with mild dish soap weekly, drying thoroughly before adding fresh litter. Rotate with an extra pan if needed.
- Add a thin top layer of baking soda to absorb moisture and scent without overpowering fragrances.
- Replace litter 100% once per week regardless of appearance, as odors hide in clumps. Always use gloves for hygiene.
Commit to this routine—odor reduction will be noticeable in a single week, making your entire space feel cleaner fast.
Treat Carpet and Upholstery with Precision
Pets will sneak fur and dander into rugs, sofas, and curtains no matter how vigilant you are. Address these with focused pet area cleaning steps targeting both hair and lingering scent traces.
- Vacuum horizontal and vertical surfaces using a pet-specific tool, covering armrests, baseboards, and under cushions.
- Spot test cleaners on hidden fabric patches to prevent staining, then use enzyme sprays for accidents or leaks, letting them dry fully before sitting.
- Finish with a dry microfiber cloth, which clings to remaining fur without pushing it deeper into fabric.
- Air out the room after treatments to encourage odors to dissipate instead of masking them with perfumes.
- Repeat weekly or if you notice persistent odors—consistency matters as much as product choice.
Direct attention to fabric zones reduces the spread of pet scent into adjacent rooms, keeping main living spaces much fresher throughout the week.
Managing Pet Hair with Smart, Repeatable Systems
Shedding isn’t negotiable but managing pet hair with repeatable systems minimizes frustration. Consistency keeps hair from migrating room-to-room or collecting in surprise places—especially important for allergy-prone households.
Upgrade your vacuum filter to a HEPA model. Swap out brushes or heads made for pet area cleaning every three months to maintain optimal fur pickup potency and airflow.
Furniture Quick-Clean Playbook
Store removable lint rollers or rubber gloves in living areas for quick pickups. Run a slightly damp glove along couch arms or chair cushions, collecting fur efficiently without scattering it elsewhere.
For high-traffic days, swap slipcovers or use washable throws that can be laundered weekly. “I toss the blanket Max lounged on straight into the wash after dinner.” This trivial action saves significant work over time.
Leave a laundry basket near pet-favored seats so collected covers or throws aren’t dragged through clean areas—cutting down on hair transfer from room to room with every load.
Floor Focus for Dynamic Shedders
Pet area cleaning on floors means more frequent, targeted sweeps using microfiber brooms or vacuums built for fur. Tiled or vinyl spaces need less effort, yet are high-priority since stray hairs are visible and travel quickly between rooms.
For wood, sweep hair with a damp mop which traps hairs instead of sending them airborne. For carpet, alternate vacuuming paths and make two passes per zone to pull out deeply woven fur.
Schedule these floor blitzes just after grooming or playtime, matching energy to when messes happen. You’ll keep the visible and hidden fur out of your way and off your socks.
Spot-Cleaning Pet Accidents Before They Settle
Instant response prevents long-lasting odor and stains. For pet area cleaning after accidents, act the minute you see, hear, or smell something unusual—delays increase the odds that scent and discoloration settle in for good.
Store a caddy with enzyme-based cleaner, white vinegar, paper towels, and nitrile gloves right where accidents occur most. Quick reach enables you to react without hunting supplies, saving energy and boosting success.
Scripted Steps for Fast Cleanups
Copy this process for urine spills: Blot excess with towels (do not rub), apply enzyme spray, wait per bottle instructions, then let air dry. Repeat if scent remains—rushing will not resolve set-in problems.
For vomit or feces, use a spatula or scraper to lift solids, then treat with diluted vinegar solution before rinsing and dabbing dry. If residue lingers, vacuum once dry to restore fiber texture and reduce odor.
Record cleanup times on a sticky note or phone calendar if you’re training young pets. Consistent logs encourage habit-building and pinpoint accident-prone intervals for proactive changes.
Wall and Baseboard Touch-Ups
Spray a cloth, not the wall, before wiping baseboards or lower walls. This avoids liquid seeping into cracks and collecting hair or debris down low where pets rub or shake out fur.
Check for splatter streaks or subtle stains at pet height each sweep. Removing these promptly means they never age into more stubborn, visible marks.
Opt for gentle dish soap solutions instead of harsh cleaners to keep paint and finishes vibrant—even after frequent pet area cleaning touch-ups along walls.
Protecting Floors and Furniture from Fur and Smells
Cut down on long-term pet area cleaning by taking defensive actions. Shields under food bowls or in favorite nap corners catch messes before they take over, saving deep-clean hours later.
Train pets to use specific beds or mats, reinforcing with treats or praise. This condenses hair and odor to smaller zones that are quick to target whenever you clean or refresh the area.
- Place washable rugs beneath litter boxes and water bowls, shaking them out outdoors each day for trapped fur and debris removal.
- Apply enzyme-based sprays to crate or kennel pads after every use; let air-dry before reuse so enzymes work fully.
- Keep a towel near entryways during wet weather—wipe paws on arrival to limit mud, bacteria, and debris carried in from walks.
- Swap out standard mop heads for microfiber every two months; old fibers push odors rather than absorb them, impacting results.
- Seal hardwood or tile grout once a year to block odor absorption—particularly in pet-frequented traffic paths like hallways or close to feeding stations.
Minimizing mess at contact points means odor and fur stay localized—and easier to address, even in busy homes with multiple animals.
Tools and Supplies that Make Pet Area Cleaning Easier
Investing in reliable tools shrinks the effort and time required for keeping pet spaces clean. The right products maximize results while minimizing heavy scrubbing and frustration.
Use vacuums designed for pet hair, complete with anti-tangle rollers and HEPA filtration. Replace bags or empty bins weekly, washing reusable components monthly to prevent build-up and malfunctions.
- Select microfiber dusters, which attract loose fur and dander instead of relocating them. Wash after each session for optimal pickup.
- Keep enzyme-based cleaners stocked for fast and effective odor elimination on fabric, floors, and crates.
- Use removable, washable covers for beds and cushions; always keep at least one backup set so your pet isn’t displaced during laundry.
- Opt for food-grade baking soda as a safe and affordable way to neutralize odors—apply thinly to carpets or bedding, then vacuum after 30 minutes.
- Stock gloves and lint rollers near main cleaning zones for daily touch-ups. This lets you manage visible mess before guests arrive—even with minimal notice.
Updating tools and restocking essentials takes only minutes and pays off in stress saved and results gained. Routine maintenance for your supplies makes every stage of pet area cleaning more effective.
Consistent Grooming to Cut Down Hair and Odor
Regular, intentional grooming is the ultimate preventive for pet area cleaning—less hair shed means less to clean up overall, and healthier coats lead to fewer odors in the home environment.
Bathing and Brushing Frequency for Results
Schedule baths based on fur type and outdoor exposure—short-haired or mostly indoor pets can wait 4–6 weeks, while long-haired or frequently dirty pets benefit from biweekly washing.
Brush daily when your pet sheds, not just seasonally. Use slicker brushes for dense undercoats or rubber curry brushes for smooth coats, running hands through fur as you go to check results.
Pin down the optimal brush type and routine during one week of daily effort—note which tool collects the most hair with the least protest from your animal.
Trimming Nails and Cleaning Ears
Nail and ear care is easy to skip, but both impact overall pet health and contribute to a fresh-smelling home. Commit to weekly checks as part of your pet area cleaning plan.
Use pet-safe cutters and keep treats as rewards to encourage cooperation. For ears, use a soft cloth and mild, vet-approved cleansers, avoiding cotton swabs to prevent damage.
Overgrown nails scratch floors, while ear issues can emit odors—removing the source with gentle, quick sessions yields a neater, cleaner household overall.
Bringing It All Together for a Cleaner, Fresher Home
Daily, targeted pet area cleaning routines break down overwhelming tasks, making fur, odor, and accident management second nature—not a source of dread or frustration in your household.
Each small step keeps the air and surfaces cleaner, protecting the comfort and health of both pets and their humans. Upgrading your toolkit and focusing attention where it matters pays off immediately.
Caring for your pet’s territory is one of the simplest ways to ensure your entire living space remains inviting, healthy, and free from distracting smells or hair trails—no matter the season.
Frequently Asked Questions
Blot accidents immediately, apply enzyme-based cleaners, and let them air dry. If odors persist, sprinkle baking soda, let sit for 30 minutes, and vacuum thoroughly. Repeat weekly for ongoing relief in pet area cleaning routines.
Enzyme-based cleaners break down organic pet messes without harmful chemicals. Always test on a small surface first and choose products labeled as safe for pets to protect their sensitive paws and noses.
Aim for a weekly wash using hot water and mild detergent, then air-dry bedding in sunlight for a full refresh. This regular schedule supports both odor and hair control as part of comprehensive pet area cleaning.
It’s better to prevent odors than mask them. Use odor-neutralizing sprays designed for animal spaces, and ventilate rooms regularly. Overuse of air fresheners can irritate sensitive pet airways and may not target root causes.
Brush pets frequently, establish clear cleanup routines, and use washable throws on favorite furniture spots. Vacuum with a HEPA filter often, and keep lint rollers accessible for daily touch-ups to keep fur under control across pet area cleaning tasks.

Simple Lubrication Tips for Sliding Doors
Keep doors gliding smoothly! Follow these simple lubrication tips to fix sticking sliding doors fast. Read on and learn more!