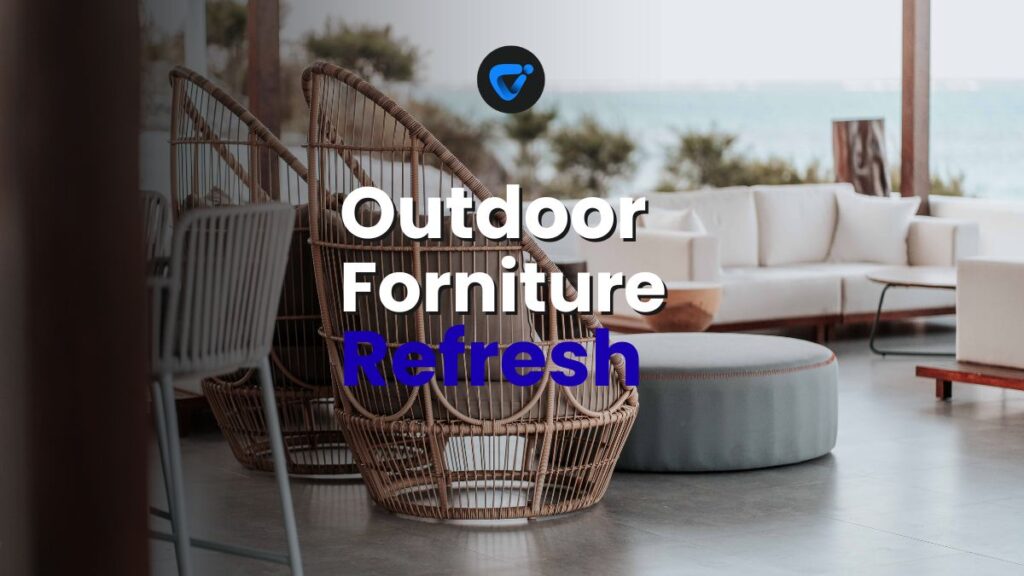
Few things feel as rewarding as stepping onto your patio and seeing outdoor furniture look inviting and fresh. The journey from grimy cushions to sparkling surfaces isn’t magic—it’s careful outdoor furniture cleaning and thoughtful maintenance year after year.
After-Renovation Dust Control and Air Quality Tips
Discover practical dust control tips after renovation! Boost air quality, use smart cleaning routines, and breathe easier at home with our expert advice and maintenance c
Outdoor spaces shape our warm-weather routines, helping us relax and connect with friends or family. As pollen, dust, and rain take their toll, good cleaning habits and seasonal refreshes ensure furniture stays bright and ready for use.
Explore this guide for practical outdoor furniture cleaning methods, clever restoration steps, and actionable micro-guides to maintain a welcoming, stylish patio through every sunny day this spring and summer.
Restore Outdoor Furniture Surfaces for Immediate Appeal
Refreshing surfaces delivers the quickest visual change for outdoor furniture cleaning and transformation. A dedicated approach means you’ll remove stains, handle mildew, and revive faded finishes with visible, satisfying results in just one afternoon.
Actively attending to surfaces resets your entire setup, instantly making patios and decks feel hygienic and fresh. Cleaners, brushes, and patience are all you need—no specialist tools required.
Apply the Two-Bucket Cleaning Rule
For efficient outdoor furniture cleaning, use one bucket for soapy water and another for rinsing. Dip a soft cloth in the soapy mix, clean one section, then rinse the cloth well before moving to the next. This stops grime and soapy residue from leaving streaks.
Spritzing with plain water first loosens dust and debris, reducing the risk of scratches or grinding dirt into surfaces. The two-bucket method is recommended for metal, plastic, and resin chairs, BBQ carts, and tables. Wax or oil wooden furniture after cleaning to restore shine.
A homeowner said, “I wiped down chairs using two buckets and saw the color return after just a few rounds. It’s fast, and dirt doesn’t stand a chance.”
Neutralize Mildew Safely Every Season
Mildew loves damp cushions and shady corners. To treat it, make a mixture of one quart of water and a tablespoon of dish soap or white vinegar. Apply with a sponge, allowing the solution to sit for 10–15 minutes before rinsing thoroughly with clean water.
Brush gently with a medium-stiff brush to dislodge any stubborn growth. Always let items dry completely in sunlight to kill mildew spores. Outdoor furniture cleaning routines like this keep musty smells and dark patches away season after season.
After a rainy week, a quick check under cushions—then a vinegar wash if needed—saves time and frustration later in the summer.
| Material | Best Cleaner | Drying Method | Care Tip |
|---|---|---|---|
| Metal | Mild soap and water | Air dry in shade | Apply rust-resistant spray after cleaning |
| Plastic/Resin | Baking soda solution | Wipe with a dry cloth | Avoid harsh scrubbers to prevent scratches |
| Wood/Teak | Special wood cleaner | Sun dry fully | Oil or seal annually to prevent fading |
| Wicker | Diluted vinegar solution | Pat with a towel, then air dry | Store undercover when not in use |
| Fabric | Water and mild detergent | Sun dry, flipping cushions once | Remove covers if possible before washing |
Refresh Outdoor Fabrics and Cushions for Lasting Comfort
Reviving fabric and cushion comfort helps keep seating welcoming long after the first sunny day. Active outdoor furniture cleaning routines tackle mildew, tree sap, and greasy barbecue stains with ingredients from your kitchen, extending fabric life for seasons to come.
Clear, repeatable steps mean you’re never stuck with dingy cushions. Start by unzipping cushion covers (if possible), shaking out debris, then spot-cleaning visible stains with dish soap and warm water applied with a gentle cloth.
Spot-Treat Before Deep Cleaning
Before washing entire covers or scrubbing full surfaces, treat isolated stains promptly. Use a soft-bristled toothbrush dipped in detergent and water to attack spills or streaks. Avoid bleach, as it can weaken fabric and fade dye. Blot with a clean towel and air dry.
- Vacuum loose debris to prevent rubbing dirt deeper during washing. Go edge-to-edge across every cushion and under furniture arms with a brush attachment for best results.
- Treat greasy marks with baking soda. Sprinkle directly, let sit 20 minutes, then vacuum away before spot-washing with dish soap. This absorbs oils and preps fibers for cleaning.
- Handle mildew with diluted white vinegar. Mix equal parts vinegar and water, spray where mildew appears, wait ten minutes, then gently blot before washing. The vinegar solution deodorizes while removing spores.
- For fabric revitalization, add half a cup of white vinegar to the final rinse cycle. This restores softness and helps break down soap residue left behind.
- Dry all items in sunlight, flipping after an hour. Sunlight sanitizes cushions as it dries and speeds up the process. Avoid tumble dryers, which can warp seams or shrink covers.
Outdoor furniture cleaning that starts with spot-treating makes every other step more effective. Quick attention to trouble spots keeps cushions looking new all season.
Maintain Fabric Color with Gentle Techniques
After stains are gone and the entire cover has been washed, preserve color and fiber structure. Fill a bucket with cold water and two capfuls of gentle laundry detergent designed for delicates; soak covers 15–20 minutes before rinsing.
- Swish gently with your hands to avoid stretching seams. Rinse in cold water, lay the cover flat on a towel, and roll to remove excess moisture. Direct wringing twists fibers and fades pattern vibrance.
- Treat fading proactively: Store cushions out of direct sun when not in use, using a weatherproof storage bin or indoor space. This cuts down sun bleaching and premature wear.
- Mix one teaspoon of color-safe oxygen bleach with water to restore brightness. Brush carefully, rinse well, and dry in shade to avoid streaks.
- Rotate placements every week: Place front row cushions at the back and vice versa to ensure even sun exposure and long-term color preservation.
- Protect against rain: Cover cushions with a tarp or fitted furniture cover during spring showers or overnight to reduce water absorption and prevent mildew formation.
Seasonal outdoor furniture cleaning makes preserving color and cushion integrity simple, even when unexpected weather rolls in.
Sharpen Up Metal, Wood, and Wicker Details for a Cohesive Look
Maintaining decorative finishes on all frame types prevents slow deterioration and extends lifespan. Dedicating 30 minutes to each material every two months maintains shine and protects investments from rust, fading, and warping during humid spells.
This section walks through realistic routines for both quick touch-ups and in-depth restorative cleaning—all tailored for metal, wood, and wicker details found on patio furniture sets.
Sequence for Removing Rust from Metal Furniture
First, inspect all surfaces using gloved hands to feel roughness—a sign of early rust. Next, dip coarse steel wool in equal parts white vinegar and lemon juice, then scrub rust spots until bare metal shows. Rinse thoroughly to neutralize acids.
After the area is dry, apply a thin layer of car wax or metal protectant using a soft rag. Buff to a shine. As a last step, re-tighten joints and inspect for any wobble, as you might notice after winter storage shifts.
Finish by adding rubber or silicone bumpers under feet to prevent future water accumulation and slow new rust formation. This simple routine reinvigorates outdoor furniture cleaning and proactively guards metal sets from the elements.
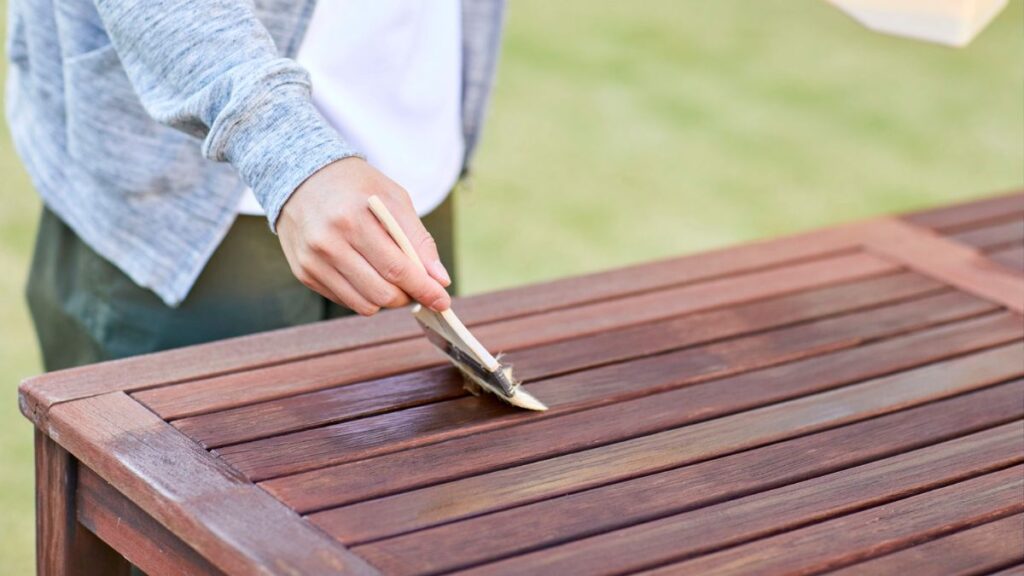
Wood and Wicker: Conditioner and Structural Care
Begin by dusting wood or wicker furniture with a slightly damp microfiber cloth. Create a mild soapy solution or choose wood-specific cleaners for tougher buildup. Avoid soaking—lightly mist persistent grime, scrubbing with the wood grain or along wicker curves.
Once dry, apply teak or wood oil using clean cotton rags, always moving with the grain to restore sheen and repel water. For loose cane or fraying areas, tuck fibers back using a wooden skewer. Secure with a touch of clear outdoor glue.
Set items in filtered sunlight for several hours, flipping as needed to encourage even drying. Repeat this process every spring and fall for lustrous, healthy-looking frames as part of your outdoor furniture cleaning schedule.
Protect and Store Patio Pieces Between Uses
Preventing damage between gatherings lets your efforts pay off for months. Outdoor furniture cleaning goes hand in hand with smart storage solutions—weatherproof covers, strategic placement, and regular air-outs make the difference between one-season and multi-year enjoyment.
Folding, stacking, and organizing patio pieces creates a stress-free seasonal transition. Every action in this section can be finished in minutes, so even busy homeowners can adopt these habits.
Seasonal Storage Micro-Checklist
Wipe down each surface with an all-purpose disinfectant or vinegar spray, then dry thoroughly before storage. Next, fold tables and chairs or collapse sectional parts to minimize needed space. Keep hardware, screws, or accessories in labeled containers for easy reassembly.
- Slide stackable chairs into sheltered corners of the porch after use. This prevents wind from toppling them and cuts sun exposure, preserving paint and material strength.
- Drape fitted covers tightly across each piece. Choose breathable fabrics so condensation doesn’t form. Mold and mildew can’t thrive when air circulates, keeping maintenance simple.
- Arrange storage bins for cushions in the garage, basement, or a weatherproof shed. Place the bins off the ground to avoid flood damage during spring rains.
- Install wall hooks in utility rooms for small tables, lanterns, and collapsible items. This frees up floor space and keeps outdoor decor looking tidy when not in service.
- Set aside a dedicated “cleaning caddy” with essentials like sponges, gentle soaps, soft brushes, and backup towels. Keep it nearby so outdoor furniture cleaning feels less like a chore and more like a quick reset.
Establishing a clean-before-storage habit brings instant relief when pulling items out next season; nothing is sticky, dusty, or surprise-mildewed after months away.
Extra Layering for Stronger Weather Defenses
Double up coverings during unpredictable weather spells: add a tarp beneath lightweight furniture to block ground moisture and another layer above for rain resistance. Anchor edges with bricks or garden stakes to avoid shifting when winds pick up.
- Elevate patio pieces on rubber mats or wooden slats to encourage airflow under furniture bases. This reduces the risk of ground rot or staining on decks and concrete.
- Add silica gel packs or moisture-absorbing sachets to storage bins and cushion covers. These quietly soak up extra humidity and keep mildew growth at bay between cleaning sessions.
- Label stored furniture clearly, especially if your setup spans multiple seating areas. Clear labeling prevents confusion and lets you rotate usage for even wear each season.
- Rotate outdoor furniture placement every few weeks. This equalizes sun and weather exposure, helping materials remain strong and attractive across every piece in your collection.
- Install a simple shade sail or temporary awning on the sunniest side of your patio to ease fading and overheating on both fabric and frame. This supports longer-lasting outdoor furniture cleaning efforts throughout spring and summer.
Layering protection keeps your patio set fresh, comfortable, and ready for neighbors or parties, however unpredictable the climate may be this spring and summer.
Small Repairs and Touch-Ups Boost Long-Term Value
Performing minor fixes helps outdoor furniture recover from chips, snags, and normal aging. Addressing problems promptly cuts replacement costs and makes ongoing outdoor furniture cleaning more effective every season you use your setup.
This stage includes easy-to-learn repairs like tightening screws, filling wood cracks, re-stitching split seams, and restoring surface coatings to extend life and enhance appearance.
Tighten, Patch, and Replace Components
Set a schedule to check bolts and fasteners each month. Use a basic screwdriver or Allen wrench to re-secure any loose legs, arms, or seatbacks. This quick step improves safety and stability, preventing wobbling during lively gatherings.
Mend minor tears with exterior-grade thread and a sturdy hand needle. If you notice a damaged panel or broken wicker strand, swap the area with a patch kit or call a local furniture service for larger fixes.
Refresh faded paint or varnish by sanding away peeling spots, applying new product in thin coats, and drying between layers. Completing repairs as part of outdoor furniture cleaning makes damage less likely to compound.
Keep a Repair Kit Handy for Unexpected Fixes
Prepare a labeled box with spare bolts, replacement slats, outdoor-rated adhesives, and a portable toolkit for mid-season touch-ups. Place it on a shelf close to your patio door so access is quick and easy when accidents happen.
This simple system lets you interrupt a problem at the source. Maybe you’ll notice a popped seam as you’re wiping down cushions for outdoor furniture cleaning—now you can stitch it right away instead of letting it worsen.
Avoid waiting for bigger repairs by taking 10 minutes at month’s end to inspect each piece. Most fixes take less than 15 minutes but add years to your outdoor furniture’s appearance and usability.
Regular Cleaning Schedules Keep Furniture Fresh All Season
Creating a clear cleaning schedule ensures outdoor furniture cleaning becomes second nature—a small habit with a big payoff in comfort and aesthetics. Regular checklists turn daunting maintenance into easy, satisfying routines everyone at home can pitch in on.
Break big projects into manageable weekly, monthly, and seasonal tasks for best results. Coax your household into regular outdoor furniture cleaning with a printable checklist on the fridge so everyone knows what’s needed and when.
- Wipe surfaces every week to remove dust and pollen buildup before stains set, cutting scrubbing time later and preserving vibrancy.
- Vacuum or shake cushions every two weeks; this keeps them fluffy and fresh while keeping dirt from grinding into fabrics.
- Wash covers and umbrella canopies monthly or whenever they lose their brightness. Plan this task for sunny days so everything dries fully in daylight.
- Oil or wax wood frames at the start and end of every summer. This locks in moisture and shields against sun and rain exposure, lengthening life.
- Inspect for wear every month: scan for cracks, mildew spots, and wobbly joints to nip small issues before they escalate, saving frustration during gatherings.
Consistent attention means outdoor furniture cleaning never piles up—your patio always feels inviting, and upkeep feels manageable throughout spring and summer.
Sustain Your Outdoor Oasis with Consistent, Smart Cleaning
Regular, focused outdoor furniture cleaning delivers both short-term satisfaction and long-term value. You’ll see fresher colors, stronger frames, and inviting textures after just a few hours of well-timed care each spring and summer.
Setting aside time for cleaning, spot repairs, and careful storage ensures every piece looks as good in August as it did in May. Each routine simplifies the next, building a cycle of ease and pride in your outdoor space.
Every season, outdoor furniture cleaning empowers you to enjoy the best of your patio—clean, comfortable, and always ready to welcome guests, family, or a well-deserved afternoon alone with a lemonade.
Frequently Asked Questions
For best results, clean high-use pieces weekly, especially after storms or heavy pollen. Deep clean cushions and frames at least monthly, adjusting more often if spills, bird droppings, or mildew appear unexpectedly.
A mix of mild dish soap and warm water works on most materials. Test on an inconspicuous area first. Always avoid harsh abrasives and strong bleach, especially for fabrics and wood, to prevent premature color loss or material breakdown during outdoor furniture cleaning sessions.
Use a pressure washer only for hard materials like metal or plastic and keep settings low. Hold the nozzle at least two feet away to avoid chipping paint or damaging fabric. Never pressure wash wood or wicker—gentle hand cleaning works best for these.
Dry all cushions fully in sunlight after each wash. Store them in a breathable container or covered bin when rain is likely. Shake cushions weekly and spot-treat areas where moisture can linger to keep mildew from gaining a foothold.
First, complete a thorough outdoor furniture cleaning. Then, apply appropriate oil, wax, or touch-up paint for your material. Let each coat dry fully before use. Rotating furniture and protecting it from direct sun preserves finish longevity for future seasons.

Post-Party Cleanup: Fast Track to Normalcy at Home
Party’s over? Get your home spotless fast! Follow our post-party cleanup guide to restore order and freshness in no time.