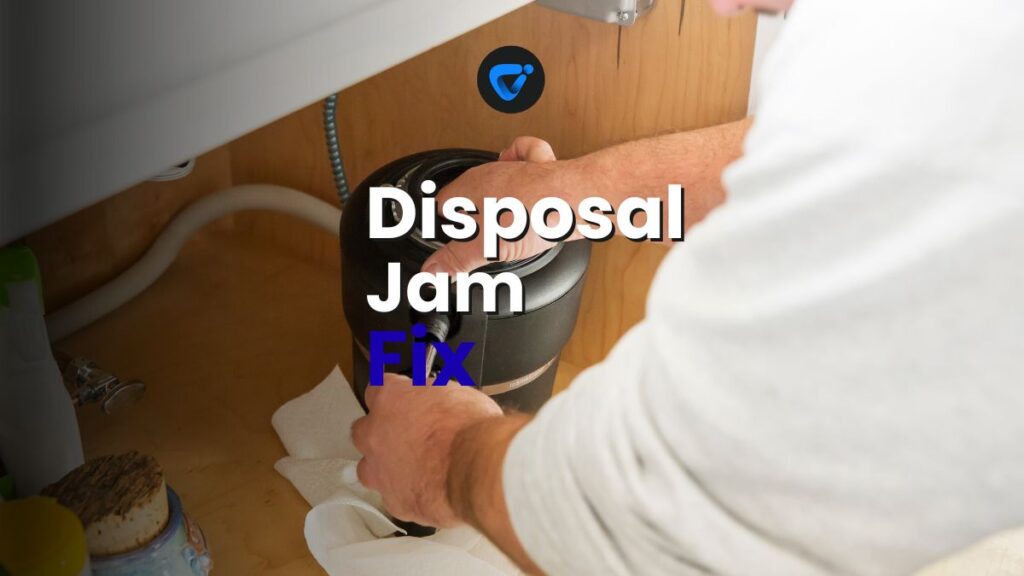
Nothing derails a busy morning quite like a jammed kitchen disposal. If you’re researching a garbage disposal fix, you’re in good company—blocked units are a classic home challenge.

Preventing Basement Flooding
Keep your basement dry! Discover simple upgrades that stop flooding and protect your home from costly water damage.
Food particles and non-food debris can both cause disposals to seize up. When that humming sound kicks in, it’s usually a sign the blades are stuck and need attention.
This guide reveals step-by-step garbage disposal fix strategies you can try at home. Pull on some gloves and follow along—you might save time, money, and the stress of a plumber call.
Pinpointing the Jam: Identify the Cause Before You Start
Zeroing in on why your disposal won’t spin will save you frustration and effort. Always power off the unit before any hands-on troubleshooting begins.
Start by shining a flashlight into the opening. Vegetable peels, bones, or foreign objects are frequently to blame—immediate removal can resolve many issues.
Visual Checks That Prevent Repeat Jams
Scan for shiny utensils, broken glass, or stringy food. If you spot anything, use tongs—not your hands—to pull it out, as blades are sharp even when not spinning.
Pause and rotate the reset button if your disposal hums but doesn’t grind. When you restore the power, listen for normal sounds. If silence persists, continue diagnosing.
Put safety first by keeping the breaker switch off during inspection. Even a quick flip of the switch can catch fingers if the appliance comes alive.
Assessing Odors, Leaks, and Motor Resistance
Persistent odors in the sink signal a deeper block or decaying residue. Check beneath the unit for leaks; damp spots mean internal seals aren’t holding up and need attention.
If you feel heavy resistance when turning the impeller, it’s likely jammed by hard debris. A dedicated garbage disposal fix must remove stuck items rather than just masking the symptoms.
Tight seals and dry undersinks point toward a basic clog, while wetness below usually calls for advanced repair. Tailor your fix to these surface clues for the best outcome.
The Physical and Electrical Differences in Clog Symptoms
Silent disposals indicate tripped breakers or blown fuses. When motor hums but doesn’t turn, physical blocks—think bones or fibrous peels—are likely to blame.
Understanding whether your jam is electrical (no noise) or mechanical (humming but stuck) will help you choose the right garbage disposal fix and tools for the job.
Sorting the problem saves hours of back-and-forth and narrows your troubleshooting focus. Always write down or remember the first sign you noticed—it’s a good clue for next time.
| Clog Symptom | Probable Cause | Home Fix Tool | Next Action |
|---|---|---|---|
| Humming, No Spin | Physical Debris Jam | Tongs, Allen Wrench | Remove Obstruction |
| No Noise | Electrical Issue | Breaker Reset | Check Breaker/Fuse |
| Odor, Slow Drainage | Clogged Drain Line | Plunger | Flush Line |
| Water Under Sink | Seal Leak | Plumber’s Putty | Reseal Unit |
| Rattling | Foreign Object | Tongs | Remove Object |
Essential Safety and Preparation Steps for a Smooth Fix
Always eliminate electricity risk before working on a garbage disposal fix by switching off the breaker. This one action prevents accidental startups and keeps your hands safe.
Gather gloves, tongs, a flashlight, and a small Allen wrench. Each tool adds a layer of protection and makes it easier to reach and manipulate stuck items directly.
Checklist: Readying Your Work Area
Clear the sink and counter so your tools and arms can move freely. Place a towel below the cabinet to catch drips or dropped screws as you investigate the disposal unit.
- Cut power at the breaker panel; never rely only on the wall switch (this matters because wall switches sometimes fail).
- Test by flipping the disposal switch—silent means it’s truly off.
- Use a light to see inside the disposal; good visibility speeds up any garbage disposal fix.
- Have tongs nearby; pulling with hands risks injury on sharp blades or broken debris.
- Keep an Allen wrench within reach; most models have a slot underneath for manual turning if jammed.
With these steps, you’ll avoid accidental injuries and confusion. Preparation saves extra trips, frustration, and ensures every garbage disposal fix is done right the first time.
Additional Setup: Keeping the Space Safe and Efficient
- Lay a towel in the cabinet to soak up water.
- Store removed parts in a small container to prevent loss.
- Check local codes before disconnecting any plumbing to stay compliant.
- Wear rubber gloves for improved grip and cleanliness during the garbage disposal fix.
- Have a flashlight with fresh batteries for optimal visibility.
This setup smooths out the experience and makes you more confident the disposal won’t surprise you mid-repair.
Step-by-Step Removal of Simple Blockages From the Disposal
Direct removal of blockages gives the quickest path to resolving a jammed disposal. Start with visible debris—never force objects or use sharp tools that might harm the blades.
Let’s detail an actionable sequence for a successful garbage disposal fix, focusing on safety while restoring normal function to your kitchen sink.
Tongs and Flashlight Technique for Accessible Jams
The tongs-and-flashlight combo is best for surface debris. Hold the light steady while carefully maneuvering tongs inside the chamber. Grasp any bones, bottle caps, or tough fibers between the jaws.
Remove slowly to avoid dropping bits deeper, and check the chamber’s edges before declaring it clear. This quick check removes risks and prevents a recurring need for another garbage disposal fix.
Never use your hand even if the disposal is unplugged—metal tongs protect from sharp fragments hidden among food waste.
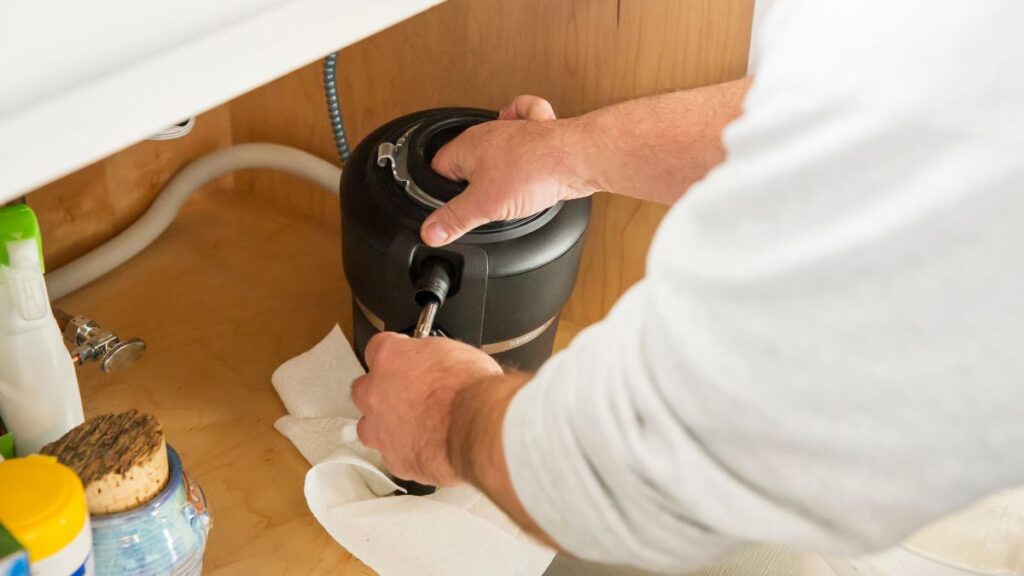
Manual Cranking With Allen Wrench Underneath
Insert an Allen wrench into the hex-shaped hole beneath the disposal’s housing. Rotate back and forth gently; this will usually dislodge stubborn, unseen jams preventing the impeller’s movement.
Listen and feel for a sudden “give”—that’s the blockage breaking free. Remove the wrench, restore power, and briefly run water to confirm the fix worked.
If resistance persists, repeat the motion in short bursts instead of forcing a full rotation. This approach reduces the risk of extra damage to the motor.
Resetting and Testing the Disposal After Clearing a Jam
Restoring power and testing the disposal confirms whether your effort resulted in a complete garbage disposal fix. This process follows a predictable, safe order.
Replace any splash guards and tools, then press the reset button at the base of the unit. Wait five seconds before flipping the wall switch back on to test normal spinning action.
What to Do If the Reset Doesn’t Solve It
If the disposal won’t spin or hum after reset, revisit earlier steps—tools or debris may still be causing issues. Double-check with light and tongs.
- Test breaker panel again—sometimes the switch trips twice during stubborn jams.
- Press reset firmly but not repeatedly to avoid shorting the button.
- Run cold water through the sink for 20 seconds while cycling the disposal switch.
- Wait a minute between tests if the motor feels warm to the touch.
- Consider unplugging the whole unit for two minutes before retrying if nothing happens.
Confirm each fix has a unique solution—repeat steps only if symptoms match your earlier diagnosis.
Using Preventive Routines to Keep Garbage Disposals Jam-Free
Proactive habits are the secret to avoiding repeat jams. Consistent cleaning and careful waste sorting reduce the need for frequent garbage disposal fix efforts.
Run cold water before, during, and after using the disposal. The consistent flow helps flush away residual gunk and lubricates the blades for smooth turning every time.
Actionable Prevention Tips for Every Kitchen
Temporarily block the disposal when peeling potatoes; drop peels directly in the trash instead of risking a clog. Use a strainer to catch accidental debris before it can reach the blades.
Schedule a monthly flush with vinegar and baking soda. This clears organic buildup and neutralizes lingering odors between deep cleanings.
If your family hosts dinner parties with lots of scraps, explain the rules: no bones, no corn husks, and never pour fats down the drain. Repeat guidance leads to fewer fixes later.
Maintaining Your Unit: Small Upgrades and Smart Habits
Simple upgrades can minimize jams and reduce the need for a surprise garbage disposal fix. Consider splash guards and strainers for persistent trouble spots.
Invest in a rubber plunger for tackling minor clogs further down the drain. It won’t hurt the disposal and gives quick relief when water backs up due to heavy loads.
Quick Maintenance Tasks for Consistent Performance
Replace worn gaskets annually to stop leaks and preserve pressure in the chamber. Swap out old wires if you notice flickering—better power flow keeps blades spinning strong.
Polish the outside of the unit with a damp rag, and tighten any loose fasteners under the sink. Regular checks ensure mechanical saws stay aligned and less prone to jolts or misfires.
Keep a calendar with maintenance dates. Regular reminders lead to fewer blockages and smoother operation over the years.
When You’re Ready to Upgrade: Knowing the Signs
If your disposal hums but stalls even after every garbage disposal fix, it may be time for a replacement. Modern models last 8–15 years with regular care and outperform older styles.
Listen for rattles, unfixable leaks, or burnt odors—these mean the motor or internal seals are wearing out. Getting ahead on replacement prevents kitchen downtime later.
When the unit finally gives out for good, always recycle or dispose of old motors safely per local guidelines—responsible disposal benefits everyone.
Frequently Asked Questions
What causes a garbage disposal to jam and stop working?
A garbage disposal usually jams when fibrous foods, bones, or non-food items become trapped in the chamber. Overloaded or overloaded with the wrong items, the blades can’t spin, stopping the motor entirely. Avoid this by sorting waste and running cold water during use.
Can I use plungers to clear a jammed disposal?
Yes, a plunger helps when the drainpipe is slow or clogged, not the blades themselves. Gently plunge with water running. For jams in the disposal chamber, always use tongs and an Allen wrench, not a plunger, to avoid damaging the mechanism.
When is it time to call a professional instead of doing a garbage disposal fix yourself?
Contact a professional if leaks appear under the unit, if electrical resets don’t restore power, or if strange noises persist after several DIY attempts. Safety is paramount—leave complex wiring or difficult leaks to licensed plumbers.
What is the correct way to reset a garbage disposal?
Locate the red or black reset button under the unit. Press it once with the power off. Restore power, then run cold water and test the disposal. If it doesn’t work after a few attempts, a deeper fix is needed.
Are chemical drain cleaners safe for garbage disposals?
No. Chemical cleaners may corrode seals and blades inside the disposal, shortening its lifespan and voiding most warranties. Always use mechanical removal, manual cranking, or natural cleaners like baking soda and vinegar for safe, effective results.
DIY Patching for Small Drywall Holes at Home
Fix wall damage fast! Follow our DIY guide to patch small drywall holes easily and get smooth, lasting results.

