
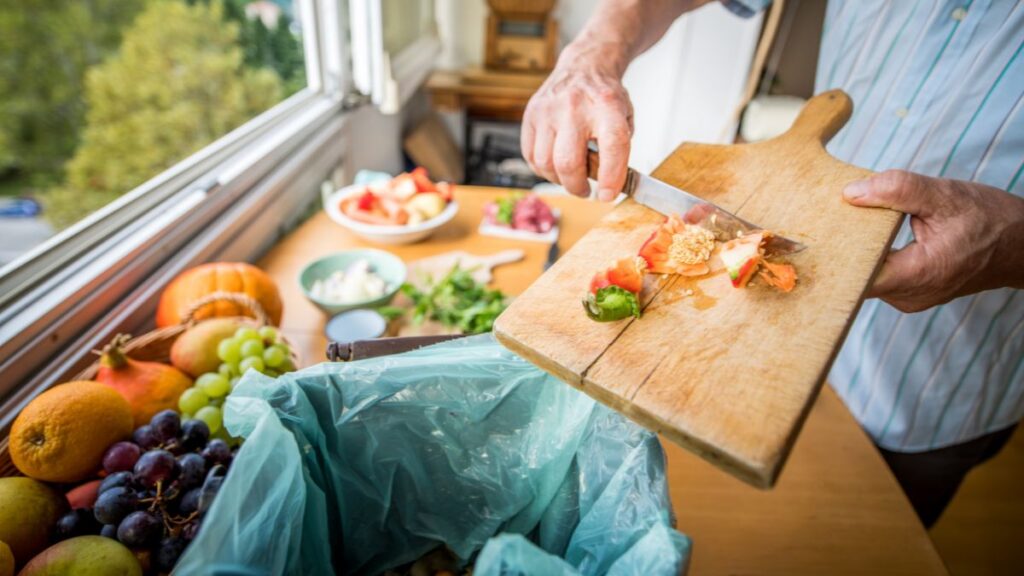
Tossing food scraps isn’t the only option when cleaning up your kitchen. Learning composting basics can weave a powerful, eco-friendly routine into home cleaning that feels just as natural as sweeping the floor.

Lemon Peels: The Hidden Powerhouse
Don’t toss those peels! Discover how lemon power can naturally clean, deodorize, and shine every corner of your home.
Composting transforms everyday waste into garden gold, drastically reducing the amount of garbage that leaves your home. By understanding composting basics, you’ll help nourish your garden, cut landfill use, and feel proud of your kitchen habits.
This guide illuminates composting basics for kitchen scraps—providing insight, practical methods, and surprising tips so you can transform food waste into resourceful home maintenance solutions.
Starting a Foolproof Compost Routine That Fits Your Home
Adopting a reliable compost habit keeps kitchen waste out of the trash and your cleaning routine running smoothly. By building systems that fit your space, you’ll make composting basics second nature.
Two common approaches stand out: countertop containers for daily scraping, and outdoor bins. Both have their perks, but your home layout dictates which composting basics will serve you best and keep odors at bay.
Choosing a Kitchen Countertop Bin That Works
A sturdy, ventilated bin sits within arm’s reach, streamlining the transfer of fruit peels, coffee grounds, and veggie bits. Flip-top lids minimize odors, and removable liners ease cleaning.
For renters or families with limited outdoor space, a compact, odor-sealed container means you can still practice composting basics right from your kitchen prep zone.
Lining your bin with paper towels or newspaper means you avoid sticky residue while sending the whole liner to the compost pile—reducing cleaning hassles in your daily routine.
Outdoor Bin Placement for Easy Access
Locating the outdoor bin off a patio, porch, or garage helps keep the system seamless. Projects transfer from kitchen to compost pile in one quick trip—no need for mess inside.
If your backyard is small, a portable tumbler can keep composting basics manageable without unnecessary heavy lifting or turning. Many models include crank handles, making the process even smoother.
Think of your outdoor bin as another cleaning appliance: it should be within the same path you take to bring out trash or recycling. This keeps composting basics as easy as tossing garbage.
| Compost Bin Type | Ideal Location | Maintenance Needs | Best For (Takeaway) |
|---|---|---|---|
| Countertop Bin | Kitchen | Empty daily, wipe weekly | Small spaces, quick access |
| Tumbling Bin | Patio, deck | Turn weekly | Low effort turning, family use |
| Traditional Pile | Backyard corner | Turn monthly | Large volume, garden use |
| Worm Bin | Indoors/garage | Feed weekly, moisten bedding | Apartment, indoor gardening |
| Enclosed Bin | Near trash area | Check for bugs, air flow | Odor control, safe from pests |
Green and Brown Scraps: Balancing Inputs for Healthy Compost
Achieving nutrient-rich compost hinges on the right mix of ‘greens’ and ‘browns.’ Greens provide nitrogen, while browns offer the carbon needed for composting basics to take effect. Mix these correctly for quick, odor-free breakdown.
Modern home cooks usually have far more green scraps than browns. This imbalance can slow decomposition or cause foul odors, so learning how to source and store browns is critical for successful composting basics.
Putting Greens and Browns to Work
Greens include coffee grounds, fruit peels, and fresh veggie trimmings. Browns are dry leaves, cardboard, and shredded paper. Every time you add greens, shield them with an equal sprinkle of browns to prevent pests and odor.
- Save dry leaves year-round in a covered bin for continuous brown supply. This sidesteps the need for extra purchases and ensures a convenient stash.
- Rip up cardboard boxes to layer between wet food scraps. Small pieces integrate easily, accelerate aeration, and help fulfill composting basics quickly.
- Keep a bag of clean sawdust or wood shavings handy. Each scoop balances out moisture-rich kitchen scraps, curbing sour smells and adding airy texture.
- Shred old office paper for carbon power. Newspaper strips go in layers, acting as a filter and giving a structured breakdown.
- Dust off egg cartons from the recycling and tear them into pieces for easy brown integration, even without dry leaves on hand.
Strive for a 1:1 or 2:1 ratio of browns to greens. With each kitchen clean-up, remind yourself to toss in a handful of browns—like a cleaning checklist for your waste.
Mixing and Turning Without the Mess
Once you’ve layered greens and browns, gently mix or turn your compost every couple of weeks. This ensures airflow and speeds up the process, keeping composting basics on track without much labor.
- Scoop and toss with a hand trowel after every major addition to prevent compacted, soggy layers.
- Use a simple garden fork every week or two for larger outdoor piles, maintaining freshness and preventing pests.
- Never mix in cooked foods or dairy; follow composting basics to avoid foul smells and raccoon visits.
- Perform a “sniff test”—healthy bins smell earthy, not sour. If not, add more browns and repeat the process.
- Let kids or helpers assist in this process, teaching responsible home cleaning habits in daily routines.
Balanced compost stirs easily, doesn’t stick to tools, and helps cultivate a healthy home garden or indoor plants.
Everyday Scraps to Use or Exclude: The Practical Guide
Understanding which scraps power your compost can spare you from setbacks. With composting basics, you can quickly sort kitchen waste—fueling healthy decomposition while avoiding materials that cause delays or draw pests.
Scraps That Support Compost Health
Fruit and vegetable peels, coffee grounds, and crushed eggshells break down quickly and provide nutrients. These should be daily staples added directly to your bin. They show up in almost every kitchen cleaning session, offering a consistent supply.
Filter coffee in paper filters goes right in. Tea bags (without synthetic strings or staples) can tag along, as can stems from herbs or wilted lettuce leaves that didn’t make the salad cut.
Smaller, chopped scraps decompose faster due to more surface area. This step mimics cleaning and prepping for a recipe—making the entire composting basics cycle more efficient.
What To Exclude for Trouble-Free Compost
Dairy, cooked food, oily leftovers, and meat don’t belong in a basic home compost. They can attract animals and cause lingering, unpleasant smells. Following composting basics means only choosing materials that break down safely and predictably.
Onion skins and citrus peels can be added in moderation but break down slowly; chop them smaller if possible. Skip large pits, vacuum dust, or anything synthetic—these will not compost well and hinder results.
Keep glossy paper, stickers, and non-biodegradable packaging out of the pile. These add unnecessary waste and block the composting basics process.
Maintaining the Right Moisture and Airflow for Odor-Free Success
You’ll notice piles that are too wet feel heavy and look slimy. Balancing moisture is essential to the composting basics, ensuring everything smells fresh and breaks down quickly. Sunshine, wind, and proper ventilation are game changers.
If your pile dries out, decomposition slows to a crawl. Think of moisture in compost like the water you use when mopping—it should be damp but never pooled.
Checking and Adjusting Moisture Quickly
A quick squeeze test reveals the right balance. Take a handful and press: if it clumps loosely, not dripping, your composting basics are dialed in. If water streams out, toss in more browns and fluff up the pile to restore balance.
Rainy days may require covering the bin or pile with cardboard or a lid. Reusing household items in this way blends home cleaning and composting basics seamlessly.
If it’s dry, spray with a little water from a reused cleaner bottle. This targeted approach ensures you don’t over-saturate, keeping the bin light and active.
Ventilating for Consistency
Regular fluffing or turning with a small rake keeps airflow steady. Imagine fluffing a rug to shake out the dust—the same theory supports your composting basics, dispersing heat and preventing odor build-up.
Outdoor bins or tumblers with built-in vents simplify this job, while manual piles benefit from poking several small holes throughout with a stick or pole.
Don’t crowd your bin in a closed closet or against a wall; airflow matters for every style of composting basics you try at home.
Solving Common Problems in Home Composting
Even with great routines, hiccups happen. Persistent odor, visible pests, or sluggish breakdowns are all signals your composting basics need adjustment. By diagnosing these issues early, you’ll sustain a productive and low-maintenance routine.
Troubleshooting starts with identifying the most visible symptoms, then acting with a clear step or checklist. Every problem has a direct fix—the trick is matching the right solution to the sign.
Smelly Piles and How to Tackle Them
Bad smells stem from excess greens or poor airflow. For sour odors, immediately add twice as many browns and fluff or turn the contents. Repeat as needed to restore a fresh, earthy scent that signals healthy composting basics.
Skip water during these adjustments. If the smell persists, check for un-compostable food scraps, like meat or greasy leftovers, and remove them quickly. They don’t belong in home compost bins.
Let the pile rest after fixing—by the next cleaning cycle, your composting basics routine should return to normal with pleasant results.
Pest Management Without Chemicals
If you spot gnats, flies, or rodents, your kitchen scraps may be too exposed or include wrong materials. Bury fresh scraps beneath a thick layer of browns and close the bin lid tightly after each use.
Avoid adding cooked food or anything sugary and sticky. If ants sneak in, shifting your bin further from the house perimeter can disrupt their path and keep composting basics worry-free.
Check bins for cracks or broken seals monthly. Repair them as soon as possible so pests never get established in the first place.
Benefits That Go Beyond the Garden
Composting basics do more than generate great fertilizer for your plants; they help streamline home cleaning, save money, and build greener habits. Each batch of compost you complete represents less waste in your trash can and more nutrients in your soil.
The mindset shift happens early—visualizing kitchen scraps not as trash but as future garden resources reshapes your daily routines and cleaning habits. The more automatic the process, the smoother your maintenance routine runs.
Scrap Reduction as a Daily Practice
Each time you empty your kitchen bin, note the reduction in weekly trash output. This builds awareness and empowers ongoing improvements—matching the goals of composting basics and effective cleaning and maintenance.
Your compost pile also becomes a teachable moment for family or roommates, sharing knowledge and distributing the home cleaning workload in manageable steps.
Sharing your success stories inspires others to adopt composting basics, improving your broader community’s sustainability habits and reducing waste for everyone involved.
Saving Money Through Kitchen Composting
Homemade compost reduces or eliminates the need for store-bought fertilizers. Over a year, you’ll notice real savings and rely less on packaged goods that add to your cleaning and organizing challenges.
Kitchen compost also extends the life of household cleaning supplies by reusing materials like paper towels as brown input, making cleaning routines even more efficient.
In the long run, composting basics drive down costs and encourage a cycle where nothing is truly wasted—mirroring the most efficient home cleaning processes possible.
Staying Committed and Enjoying the Composting Habit
The first step toward successful kitchen scrap composting is building a habit that sticks. By putting composting basics on your cleaning checklist, you’ll gain consistency and see results quickly. Small daily actions add up.
Composting basics isn’t a set-it-and-forget-it task. Engage with the process—mark reminders on your calendar and celebrate milestones, like the first finished batch or odor-free bin week. This helps make the practice automatic.
Seeing the transformation from waste to black gold feels as rewarding as a gleaming kitchen floor or tidy pantry shelf. Let each cleaning session reinforce your commitment, with composting basics always part of the workflow.
Frequently Asked Questions
Meat and dairy should not go into a home compost bin. These items attract pests, cause unpleasant odors, and break down too slowly for safe home use. Stick to plant-based kitchen scraps for best results.
Greens bring needed nitrogen, while browns supply carbon to maintain a balanced, active pile. Both help decompose scraps efficiently and prevent smelly, soggy, or pest-prone compost. Use the 1:1 or 2:1 ratio for easy results.
Add dry browns immediately and fluff or turn your pile. Remove forbidden scraps like oily foods or meats. Adjusting inputs and mixing resolves most odor issues within a week, letting you get back to regular composting basics.
Keep meat, dairy, and oily foods out entirely. Cover food scraps with plenty of browns and close the lid tightly each time you add waste. Check for broken bin seals or holes monthly to block pest entries.
Yes—indoor worm bins or small, sealed countertop composters work for apartments or homes with limited yards. Stick to plant materials and avoid overloading. Regular emptying keeps odors and pests away, so composting basics stay practical anywhere in your home.
Refillable Spray Bottles
Build your own eco cleaning station! Learn how refillable spray bottles can cut waste and make your home greener.