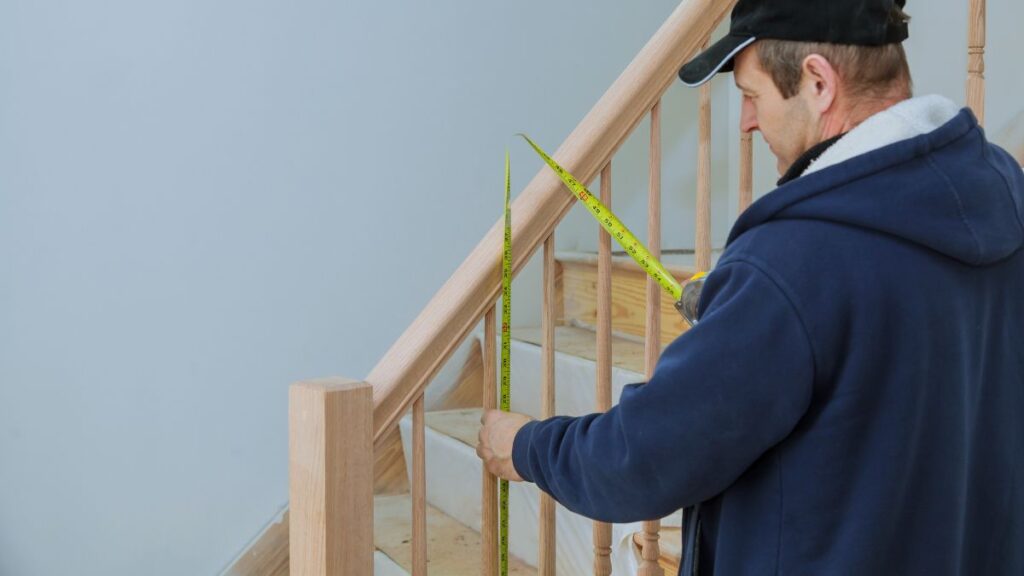
A loose stair railing can spook anyone stepping onto the staircase. Imagine grabbing for stability and feeling it wobble—unsettling, for sure. Handling stair railing repair yourself can save money while giving you confidence in your home’s safety.

Pre-Holiday Cleaning Schedule to Beat the Seasonal
Discover a practical holiday cleaning schedule with checklists, room-by-room tips, and realistic micro-habits for a stress-free, inviting home all season long.
Solid railings matter for the people and pets living or visiting your house. Extended treks up and down stairs put stress on even the sturdiest rails. Keeping up with periodic stair railing repair boosts peace of mind and prevents simple fixes from growing into larger problems.
If you’re ready to dig in, this article walks you through what causes railings to loosen, practical fixes, and clear rules for safety—so your next stair railing repair feels satisfying and secure.
Diagnosing Why the Stair Railing Is Loose
Pinpointing the root cause helps you solve the stair railing repair problem efficiently instead of patching symptoms. Start by inspecting where the railing attaches to newel posts, walls, or floors.
Feel for movement and listen for squeaks or creaks. Check screws, brackets, mounting plates, and wood for gaps, stripped threads, or soft spots. These details guide your repair strategy and tool choices.
Finding Mounting Weak Points
Walk up the stairs and gently push the handrail laterally and vertically. Watch for parts shifting or wobbling relative to the wall or posts. This tactic mimics daily use, highlighting problem spots.
If you say, “It only moves when I lean here,” that’s a clue—loose fasteners could be the culprit where your pressure finds movement. Be specific with your observations for accuracy.
Analogies help: Think of the railing as the spine of your stair system. If it bends, the backbone—the mounting points—might need bracing or more substantial fasteners.
Examining Fasteners and Materials
Use a flashlight to peer under the railing or behind posts. Look for missing screws, cracked wood, or damaged brackets. Count each fastener and check if they’re uniformly tight and aligned.
Try tightening a loose screw with a screwdriver. If it spins without tightening, the hole may be stripped—a frequent stair railing repair issue. Recognizing stripped holes helps you choose the right repair method, like using wood filler or dowels.
Notice the difference between metal and wooden railings. Metal typically loosens at joints or anchor points, while wooden rails show wear along grain lines or where hardware pulls away from lumber.
| Loose Railing Symptom | What to Look For | Likely Cause | What to Do Next |
|---|---|---|---|
| Rail wobbles side-to-side | Shifting at wall or post | Loose screws or brackets | Tighten screws and inspect mounting holes |
| Creaking sounds when grabbed | Noisy at joints | Dry wood or loose junction | Add lubricant or reinforce with glue and brackets |
| End post moves | Base wiggles | Stripped lag bolts | Replace or reinforce post connection |
| Handrail pulls from wall | Gap between wall and rail | Anchor pulled free | Use heavier-duty anchors |
| Metal screws spinning | Screw won’t tighten | Stripped metal or wood | Insert plug or filler before re-fastening |
Choosing Tools and Materials for Safe Results
Gathering the right tools and repair supplies up front minimizes frustration and increases the likelihood your stair railing repair holds for years. Select items based on your diagnosed issues.
For most common repairs, you’ll need a screwdriver (Phillips and flathead), cordless drill, wood glue, sturdy wood screws, metal brackets, spackle for stripped holes, and a stud finder for wall-mounted rails.
Must-Have Tool Kit Essentials
Keep the following handy—especially if tackling multiple locations on a rail. Cordless drills speed things up. Phillips head drivers fit most stair railing repair fasteners, while a flathead may help with vintage or decorative rails.
- Gather a cordless drill and extra battery for uninterrupted work; predrill pilot holes to prevent wood splitting.
- Use wood glue or epoxy on stripped wooden screw holes. It locks in fasteners and prevents future wiggling.
- Buy wood filler, stain or paint, and sandpaper for finishing touch-ups after visible stair railing repair work.
- Pick up new anchors for walls made of drywall or masonry—these boost holding power when rails have torn free previously.
- Have a small wrench set for tightening metal hardware on contemporary rails—bolts often need more torque than a plain screwdriver provides.
Materials That Last
Choose hardware rated for the weight and use of your stairs. Heavy-duty lag bolts or screws are best for main posts or high-traffic areas. For wall anchors, select hollow-wall or toggle anchors for maximum grip.
- Select wood screws at least 2.5 inches long for deep penetration into studs or posts; short screws loosen faster.
- Use metal wall brackets rated for stair rails—they prevent sag and handle dynamic pushing and pulling forces.
- Buy clear-drying wood glue for invisible joints; use expanding polyurethane glue sparingly to avoid cleanup headaches.
- Stain and seal bare wood after repairs—this keeps out moisture, which can rot or weaken old-fashioned handrails over time.
- Opt for high-strength construction adhesive as a backup for mounting rails to solid masonry or brick slabs.
When all tools and materials are ready, you’ll avoid unnecessary delays or shortcuts that compromise a safe stair railing repair result.
Step-by-Step Process for a Secure Stair Railing
Fixing a loose railing begins with methodical steps so no corners get cut. This approach keeps things predictable and ensures the stair railing repair solves root issues rather than just hiding them.
The order below will streamline your efforts and limit clutter or extra patching once you’re underway.
Step-by-Step Instructions for Wood Railing Repair
Start by tightening every visible screw, bolt, or bracket with the correct screwdriver or wrench. Replace stripped screws with fresh ones for a sure grip. For holes that no longer hold a screw, fill with wood filler or glue a snug-fitting wooden dowel in place, then redrill the pilot hole.
Let any glue or wood filler cure fully before mounting parts back in place. Reattach the railing and retighten. Monitor for movement—it should feel solid.
Wipe away dust and excess glue for a sharp, professional look. Touch up with matching paint or stain for seamless repairs, completing the aesthetic side of the stair railing repair.
Step-by-Step Instructions for Metal or Wall-Mounted Rails
For metal rails, use a wrench to tighten bolts or nuts at anchor points. Swap stripped hardware with new components as needed—metal-to-wood connections benefit from oversized screws or special anchors.
Wall-mounted rails require checking for solid anchors. If a stud isn’t present, install appropriate wall anchors. Drive screws in after seating anchors flush to the wall. Test the hold by bracing yourself and gently pressing on the rail.
After fixing wall or metal railings, finish by cleaning the area and checking for movement after a few hours. Reliable stair railing repair means revisiting feel and structural hold after initial use.
Preventing Future Problems with Proactive Maintenance
Scheduling routine checks each season keeps small issues from escalating. Consistent inspection allows you to detect wear and tear before it creeps into major stair railing repair territory.
Observe who’s using the rail most—a child practicing ballet or a grandparent relying on support? Heavy or repeated loads weaken connections faster, which regular upkeep can counteract.
Seasonal Maintenance Checklist
Every fall and spring, make “stair railing repair check” a standard part of home maintenance. Have a dry cloth and your tool kit ready for quick tightening, patching, or cleaning.
If you spot soft wood, swelling, or cracks near joints, repair immediately. Waiting risks accidents. Keep a log of repairs and any supplies you’ve used so replacements are always handy.
Sticking to this schedule is like tuning up your car: it’s minor work now versus expensive fixes later. Consistency builds peace of mind and preserves safety.
Adjusting for Household Changes
When family members grow, needs change. A toddler learning stairs or increased traffic during holidays means more rail stress. Adjust your monitoring intervals and be proactive in stair railing repair, especially after big events.
Moving furniture or remodeling near the stairs can also knock railings loose. Check immediately after such activity, listening for new squeaks or feeling subtle wobbles as you use the stairs. Fast repairs post-movement will save headaches later.
In cases of rental properties, communicate with tenants to report any railing issues quickly. Fast response keeps both your investment and loved ones protected with timely stair railing repair.
What to Avoid: Common Stair Railing Repair Mistakes
Some fixes look fine at first but leave hazards hidden in plain sight. Now, you’ll learn how to steer clear of shortcuts that jeopardize long-term safety in stair railing repair projects.
Patching over damage or using undersized screws might seem faster. These approaches conceal weaknesses and set you up for a repeat repair during the next stair rush.
Checklist of Top Errors to Skip
Refer to this checklist when you’re midway through your stair railing repair—or planning to start.
- Never reuse stripped screws—install oversize replacements for a fresh grip that lasts.
- Don’t skip curing time for glue or fillers, or the repair may not bond.
- Avoid misaligned reassembly—line up rails and brackets before fastening for seamless strength.
- Steer clear of mismatched hardware; weaker parts will fail under stress.
- Don’t cover cracked wood with putty alone; reinforce or replace damaged sections for true safety.
By referring to this guide, you’ll learn from others’ mistakes and secure your home against repeat failures that could risk falls or further damage.
Practical Tips for Safer and Longer-Lasting Railings
Small, thoughtful steps taken during stair railing repair build a more durable result. Pay attention to the details as you complete each phase for maximum benefit.
Consider both appearance and integrity; balanced repairs ensure your railing does its job and complements your space visually.
Advanced Tips for a Professional Touch
After securing all fasteners, run your hand along every joint and bracket to feel for smoothness and gaps. Sand sharp or uneven areas to prevent accidental scrapes—especially where little hands might hold the rail.
- Seal repaired areas with matching finish or clear sealant to deter moisture penetration.
- Add anti-slip tape to the top edge for extra security.
- Secure decorative caps tightly—loose finials can become surprising tripping hazards.
- Install padding under brackets for vibration absorption in high-traffic stairways.
- Display maintenance reminders near stairs, prompting household members to report or observe any wobble.
With every small improvement, you boost safety, comfort, and aesthetics through informed stair railing repair habits.
Making Your Staircase a Trustworthy Centerpiece
Stair railing repair combines problem-solving, craftsmanship, and a focus on safety. From diagnosis to finishing, each phase prevents costly future failures and creates a welcoming atmosphere for all who use the stairs.
Families, guests, and pets all benefit from sturdy rails that don’t give when leaned on. Well-maintained staircases make your home more inviting and calm, removing hidden hazards from daily life.
Commit to proactive stair railing repair habits—routine inspections, quick fixes, and smart upgrades. Your staircase becomes a reliable, stylish asset that everyone will trust for years to come.
Frequently Asked Questions
Fill the hole with wood glue and a wooden dowel cut to fit. Allow it to dry completely, then drill a new pilot hole for the screw. This creates a tight, long-lasting fit that won’t easily loosen again in frequent stair railing repair situations.
If the newel post wobbles at the base, check for split wood, rot, or structural cracks. Significant movement or damage beyond surface level means replacement is safest, as patching would only mask a deeper issue and frequent stair railing repair would still be needed.
In some cases, tightening accessible screws or bolts restores stability. However, if the underlying supports or wall anchors are loose, partial disassembly is necessary to address these areas directly for a reliable stair railing repair outcome.
For drywall, use toggle bolts or heavy-duty hollow-wall anchors designed for stair railings. They spread force inside the wall, preventing pullout and providing long-term strength—a crucial part of comprehensive stair railing repair.
It’s wise to check every six months, or after any heavy use or nearby construction. Feeling for movement and scanning for cracks helps you spot issues before accidents happen, reinforcing safe stair railing repair outcomes in the long run.

End-of-Lease Deep Clean for a Full Deposit Return
Get your full deposit back with a proper end-of-lease deep clean. Follow our quick guide and move out stress-free!