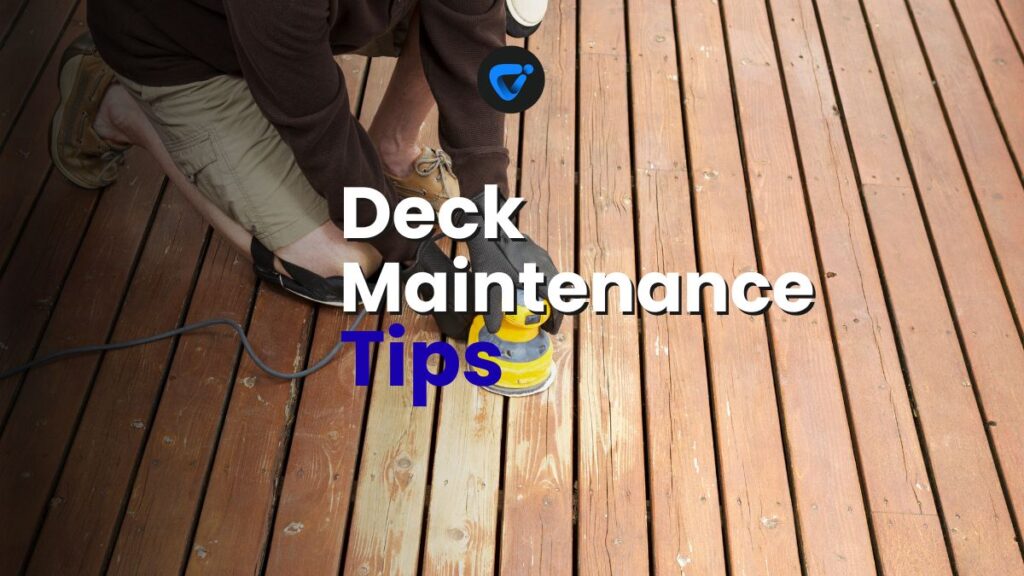
Summer barbecues, quiet mornings with coffee, and after-dinner stargazing—your deck handles it all. But skipping deck maintenance can turn those dreams sour fast, especially when wood rot creeps in unseen.

How to Tighten a Loose Stair Railing
Fix wobbly railings fast! Learn how to tighten a loose stair railing safely for secure, lasting results. Read on!
Wood rot isn’t just a nuisance; it quietly compromises safety, looks, and home value. Deck maintenance matters for every homeowner who cares about protecting their space and ensuring family gatherings stay memorable—not costly.
If you’ve ever spotted a spongy board or splintered step, this guide dives into exactly what to do. Let’s walk through actionable, real-life deck maintenance steps so you prevent wood rot before it starts.
Spot Common Wood Rot Triggers: Visual Cues and Touch Tests That Matter
When you know the warning signs, you catch deck problems early—before they cost you a weekend or a paycheck. This section covers what to look for and simple ways to spot rot.
Relying on guesswork doesn’t work. Train your eye and hand with specific indicators during routine deck maintenance to distinguish healthy boards from compromised ones.
Check Board Color and Texture for Early Damage
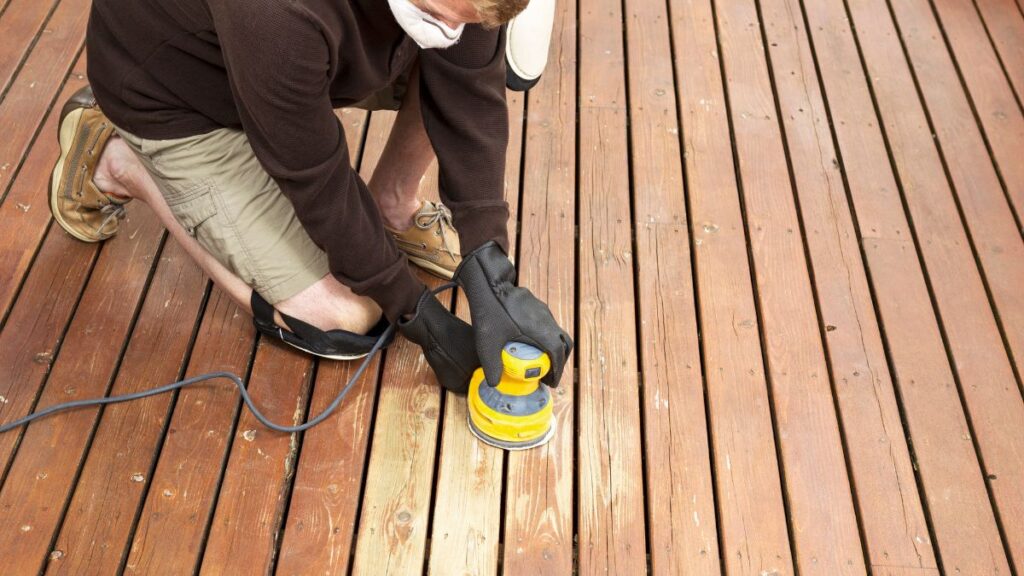
During deck maintenance, always look for soft, darkened patches on deck boards. These spots crumble easily or show gray streaks, especially after rain. For comparison, healthy deck wood looks firm and has a uniform color throughout.
Run your hand along the top and edge of each board during cleaning or restaining. Rotting wood feels spongy or fibrous rather than solid. It sometimes sheds splinters easily.
Use a screwdriver to gently probe suspect boards during deck maintenance. If you can push the tip in without resistance, wood rot could already be set in. Replace any compromised boards immediately.
Test Deck Posts and Joists for Structural Strength
Focus on structural supports—the posts and joists—because wood rot means more than just ugly decks: it threatens stability. Inspect posts where they hit the ground; water collects here, spurring rapid decay.
Give posts a quick nudge with your foot during routine deck maintenance. If there’s flexing or a hollow thud, you’ve got a concern. Solid posts remain rigid and sound deep and dense.
Don’t ignore deck joists beneath boards. Use a flashlight and mirror to spot hidden patches. If you see mushroom growth or notice a musty smell, investigate further—their presence means significant rot risk.
| Check Point | What to Look For | When to Inspect | Next Step |
|---|---|---|---|
| Deck Boards | Soft spots, discoloration | Every 3-6 months | Replace if compromised |
| Support Posts | Mushrooms, crumbling base | Spring/Fall | Reinforce or swap post |
| Joists | Musty odor, flexing | Yearly | Treat or consult pro |
| Railings | Loose joints, splintering | Quarterly | Tighten/replace |
| Fasteners | Rust, upward pop | 6-12 months | Replace with stainless |
Plan and Execute a Consistent Cleaning Routine That Works All Year
Regular deck cleaning removes moisture-trapping debris and interrupts rot’s progress. Smart deck maintenance means sticking to an easy, repeatable schedule built around weather and use.
Think of debris as a soggy blanket covering your deck: every bit accelerates moisture damage. Move beyond surface sweeping for real protection.
Spot-Clean After Storms and Seasonal Changes
Right after heavy rain or wind, sweep your deck thoroughly. Pay attention to corners where leaves and twigs collect. Remove flowerpots and shake out mats—these trap water and breed rot under hidden surfaces.
- Sweep before rainfall to preempt clogged seams and puddling.
- Use a plastic putty knife to clean between deck boards; that dislodges debris safely without nicking the wood.
- Lift up planters and patio furniture every few weeks to check for mold or moisture stains.
- Clean up after big gatherings quickly—spilled drinks and food feed mold growth and attract insects.
- For shaded decks, scrub algae and moss using soapy water to stop slick, surface-level rot from taking hold.
Schedule these tasks as a habit after visible weather events and calendar changes—this way, no season surprises you with rot.
Deep Clean for Long-Term Deck Defense
Commit to a quarterly or twice-yearly deck wash using a gentle wood-safe detergent. Avoid harsh pressure washers unless absolutely necessary—they can gouge old boards, accelerating splintering and risking water intrusion.
- Mix a solution of warm water and OxiClean or a deck-specific cleaner.
- Work in small areas, scrubbing boards with a stiff-bristled brush.
- Rinse thoroughly with a garden hose, never leaving residue behind.
- Spot treat stained or mildewed patches before rinsing off everything.
- Let the deck air dry for at least 48 hours before replacing furniture or planters.
Consistency wins: mark these dates on your home maintenance calendar to stay on track and keep wood rot far away.
Seal and Protect Surfaces with Purpose: Product Choices for Any Deck
Choosing the right sealant during deck maintenance stops water from settling in, which is crucial for fighting wood rot. It’s like putting on a waterproof jacket before a storm—only your deck benefits year-round.
Different decks need slightly different protection. Be specific: check if your wood is pressure-treated, cedar, redwood, or composite, and tailor your sealing approach accordingly.
Sealant Shopping: What Works and Why
Penetrating sealers are best for most home deck maintenance jobs. They soak into the wood, create a water-resistant barrier, and let boards “breathe,” releasing trapped moisture so it doesn’t rot internally.
Film-forming stains add color and a UV barrier. Use these if your deck gets bright, direct sunlight—a must for preventing greying as well as rot. Always check for mildew resistance if your region is humid.
Oil-based sealants are durable but can darken wood over time. Water-based products dry quicker and are more environmentally friendly. Decide based on your climate, sun exposure, and maintenance willingness.
Real-Life Application: Script for a Successful Sealing Day
Start by making sure your deck is clean and dry for at least 48 hours. Walk around barefoot during deck maintenance to feel tricky damp spots—you want boards evenly dry before sealing.
Apply the sealant or stain with a long-handled roller or quality brush, working with the wood grain for even coverage. Pull deck furniture aside and tape off edges so nothing gets missed or stained.
Repeat touch-ups every two to three years, or sooner if you notice water no longer beads up on the surface. Fast action here is crucial—don’t delay when you see fading or dullness.
Replace and Repair: Action Steps for Damaged Boards, Posts, or Railings
Replace compromised deck components immediately to stop wood rot from spreading, just like you’d snip damaged leaves from a houseplant. Prompt action means longer lifespan and lower repair costs.
Deck maintenance isn’t just about cleaning—it’s about knowing when to swap, reinforce, or discard boards and supports with visible rot. Work methodically for best, lasting results.
Step-By-Step: Remove Rotten Deck Boards
Wear gloves during this deck maintenance process, as splintered rot can scratch hands. Use a pry bar to gently lift the damaged board. If the board won’t budge, cut it into sections for easier removal.
Inspect underlying joists while the opening’s exposed. If they’re soft or crumbly, reinforce with added blocking or replace the joist. Make sure all fasteners are rust-free before securing anything new.
Fit the new board, aligning with end seams, and fasten down with galvanized screws or hidden deck clips—avoid nails that pop up or corrode easily.
Repair Handrails and Steps Before They Fail
During scheduled deck maintenance, check railings and steps for looseness or splintering near connections. Tighten all bolts and screws at the first sign of wobble. Replace sections that don’t hold shape or feel soft to the touch.
Sand down repaired areas to blend new wood with old, making sure you avoid trip hazards or splinters. Apply touch-up stain or sealant for seamless protection.
If wood rot is found at railing mount points, look beneath the surface for hidden damage. Install metal brackets if needed to reinforce weak posts—safety matters most here.
Direct Water Away: Drainage Solutions You Can Build Into Your Deck
Encouraging water to move off your deck fast discourages rot. No deck maintenance plan is complete until you control drainage, especially around footings, stairs, and tricky seams.
Visualize water like a guest that shouldn’t linger—invite it in, but usher it out before trouble starts. Smart design means less work later.
Install Gaps and Slope for Faster Water Runoff
Properly spaced deck boards (about 1/8 to 1/4 inch apart) speed up drying and drainage. During annual deck maintenance, use a putty knife to clear clogged gaps and a level to check for consistent slope away from the house.
For new builds or major repairs, angle decks so water naturally flows off the edge. A slope of just 1/8 inch per foot is enough—think of rain rolling off car windshields for the right effect.
Re-seal seams or end-grain cuts annually, since these are most vulnerable to standing water. That’s where hidden rot likes to sneak in and spread out unnoticed.
Add Gutter Extensions and Splash Blocks Below Stairs
Deck maintenance often means thinking beyond the deck itself. Add gutter downspout extensions to send runoff far from posts and stairs. Use splash blocks beneath stairs—sometimes overlooked—to keep soil dry.
If water pools near concrete or paver footings, lay down gravel or drainage rock. This lowers moisture levels quickly. For high decks, double-check that termination zones have a clear run-off path—no pooling means less rot risk.
Inspect these drainage features every spring. Dig out any blockages and reposition splash blocks if heavy rain has shifted them away from their mark. Protect ground-to-wood interfaces for a healthier deck base.
Preventative Upgrades: Smart Investments that Halt Rot for Good
Spend a little on upgrades during deck maintenance, and you reap years of fewer repairs. Protect vulnerable points so problems never start—less worry and more peace-of-mind.
Every choice here adds years to your deck, letting you focus on enjoyment, not emergency repairs. Durable materials and clever add-ons make all the difference.
Upgrade Fasteners and Flashing for a Longer-Lasting Deck
Old, rusty nails let in water and loosen over time. Trade these out for stainless steel or coated fasteners designed for deck maintenance. Add metal flashing anywhere the deck meets a wall or stairs to block rot-rooted leaks.
Consider post bases made of concrete or metal—these lift wood above soil and puddles, keeping it dryer year-round. Seal all cuts and end-grain after every saw or drill, even if you’re just replacing a single board.
Swap wood-to-wood junctions for metal brackets. Not only do they keep things square, but they let wet wood dry all the way around. That prevents hidden, sneaky rot from taking over where you can’t see.
Frequently Asked Questions
Look for soft spots, dark patches, and crumbling edges during deck maintenance. Use a screwdriver to gently probe boards. If it sinks in, there’s likely rot inside, and you should consider repairs.
Clean light debris weekly, do a deep-clean quarterly, and reseal every two or three years. Schedule visits around weather changes—after pollen drops or before autumn rains is ideal for thorough maintenance.
Use pressure washing with caution. Too much force splinters wood and forces water deeper, speeding up rot. For older decks or those with surface wear, choose soft-bristle scrubbing and gentle hose rinsing instead.
Small, shallow patches can sometimes be removed and replaced with wood filler and sealant during deck maintenance. If rot reaches the core, or the damage keeps returning, swap the whole board to prevent spread.
Stainless steel fasteners resist rust, staying tight for years. Proper flashing keeps water off key joints, blocking rot before it takes root. Both improvements add years to your deck’s life with less frequent repairs.
Quick Tile Grout Repair Without Full Re-Tiling
Fix cracked grout fast! Learn how to repair tile grout without re-tiling for a fresh, durable finish. Read on and learn more!

