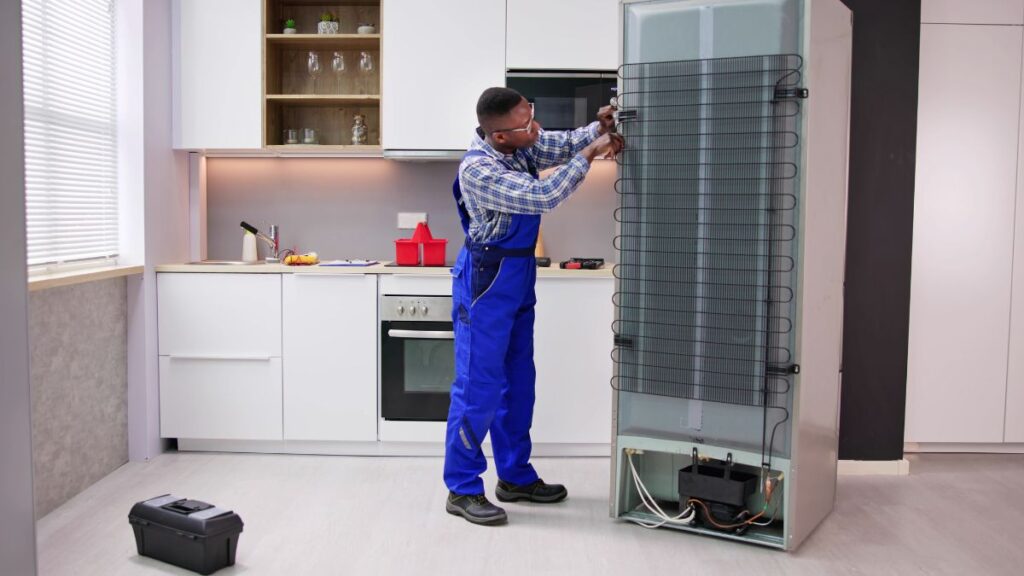
Dust bunnies built up behind your fridge aren’t cute; they’re working against your electric bill and refrigerator performance. Most folks ignore what’s happening behind their appliance, but that’s where sneaky energy waste begins. Midway through every year, refrigerator coil cleaning quietly saves homes more energy than many realize.

DIY Patching for Small Drywall Holes at Home
Fix wall damage fast! Follow our DIY guide to patch small drywall holes easily and get smooth, lasting results.
Hidden coils collect debris, forcing your fridge to labor harder to keep things cold. This struggle translates into higher utility costs and even risk of premature breakdowns. Anyone with a refrigerator at home stands to benefit from a coil cleaning session every few months.
If you’re aiming for lower bills, longer appliance life, and smart home maintenance, keep reading. This step-by-step micro-guide will show you how to tackle refrigerator coil cleaning easily, safely, and effectively—no technical background required.
See Immediate Savings by Clearing Refrigerator Coils Right
Brushing the coils behind your fridge improves airflow, lowers compressor stress, and pays off quickly in power savings. Neglected coils mean energy waste and looming repairs.
Remember, those wires at the back or underneath the fridge need to release heat. When dust and pet hair insulate them, the fridge can’t chill efficiently. Visible debris is your cue for a cleaning session.
When Homeowners Say “My Fridge Runs Too Much”
Someone might notice warm drinks or a noisy humming at night. Instead of calling for repairs, check for fuzzy coils first—it’s a common, easy-to-fix culprit.
People sometimes shrug off minor changes, but even a faint layer of lint means you’re due for refrigerator coil cleaning. Next time you mop the kitchen, peek behind and look for grayish grime.
After wiping, you’ll likely spot a cleaner, warmer coil surface. That means heat releases faster and the compressor cycles off sooner. Expect a quieter, less busy appliance afterwards.
The “What Tools Do I Need?” Checklist
You’ll want a refrigerator coil brush with flexible bristles and a long handle. These slip under or behind coils and pull dust out gently, minimizing accidental bending or kinking.
Plug in your vacuum cleaner with a hose attachment for instant debris capture. This two-part approach ensures you clear dust, crumbs, and even pet fur right away.
Some folks grab a flashlight to spot hidden buildup. A screwdriver may help with some fridge models to remove panels, but most modern types need only basic hand access.
| Tool/Item | Primary Function | Where to Use | Quick Tip/Next Step |
|---|---|---|---|
| Coil brush | Removes dust and dirt from coils | Behind/under fridge | Bristles sweep along wire surfaces; clear after each pass |
| Vacuum hose | Sucks debris from tight spaces | Coil area and floor below | Pause to empty the bag if full halfway through |
| Flashlight | Spot hidden buildup | Behind or beneath appliance | Poke light behind fridge before and after brushing |
| Gloves | Protects skin from sharp metal | Direct contact with coil or under edges | Wear before beginning; improves grip and safety |
| Screwdriver | Removes panels or barriers | Sometimes needed for bottom/front coil access | Check manufacturer guide before using on panels |
Reduce Repair Calls by Building a Quick Checklist Routine
Creating a simple coil cleaning checklist guards against forgetfulness and keeps your fridge running optimally. Print your steps and tape the list nearby for easy referencing.
Visual reminders prompt action, especially when tight schedules get in the way. A regular system frees mental energy for more interesting tasks while supporting refrigerator coil cleaning every season.
Essential Pre-Clean Safety Steps
Unplug the refrigerator to avoid electrical risk. While rare, coils can conduct a mild shock if brushed with the appliance still on. Wait five minutes for the compressor to cool, and always move slowly.
- Unplug your fridge to remove any electrical hazard, waiting several minutes before cleaning to let the system cool.
- Clear floor space behind or under the fridge to prevent tripping and make movement easier during the process.
- Grab your coil brush, gloves, and vacuum so everything you need is at arm’s length before you begin.
- Use a flashlight to illuminate coils; this makes it easier to spot debris and be thorough with refrigerator coil cleaning.
- Wipe surrounding walls or molding to prevent dust from re-settling soon after you’ve cleaned your coils.
Post-cleanup, re-plug the fridge and listen for quieter operation after half an hour; that gentle hum is a sign of regained efficiency.
Quick Reference Checklist for Future Cleaning Sessions
Write out a simple checklist on sticky notes or in your phone to jog your memory every three or six months. Consistency multiplies the energy-saving benefits.
- Mark your cleaning date on a calendar app to establish a routine for refrigerator coil cleaning every quarter.
- Check coil area when sweeping kitchens for general cleaning, building it into ordinary chores instead of a once-a-year event.
- Ask housemates to help move the fridge and set a timer for ten minutes—makes coil care more social and memorable.
- Snap a photo of cleaned coils for a “before and after” comparison, reinforcing the visible difference and pride in your maintenance work.
- Record your utility bill amount monthly and highlight changes after coil cleaning, drawing a direct link between effort and savings.
Visual cues and reminders speed up future cleanings and motivate everyone at home to get involved, keeping refrigerator coil cleaning top of mind.
Spot Real-World Signs That Your Coils Need Attention
People typically realize their fridge is working too hard when drinks don’t cool as quickly or freezer frost builds up. A vigilant eye for subtle clues leads to proactive refrigerator coil cleaning, preventing bigger issues down the line.
Scenario: Noticing Performance Changes
Suppose you reach into the fridge for leftovers and notice they’re lukewarm. The outside feels warm to the touch too. These physical cues usually indicate dirty coils or a blocked airflow.
On humid days, frost or condensation forming around fridge doors can mean coils aren’t releasing heat fast enough. Write down the date, check for dust buildup, and set a cleaning date soon after.
Friends might comment on the fridge humming louder or running longer between stops. This extra noise signals overworked components struggling against clogged coils—time for refrigerator coil cleaning right away.
Scenario: Monthly Bill Surprises as a Wake-Up Call
If your electric bill jumped 10-15 dollars last month, and nothing else in your house changed, double-check your fridge’s energy use. Setting a recurring reminder for quarterly coil cleaning can even out these billing spikes.
Use analogies, like thinking of refrigerator coils like radiator fins—you wouldn’t insulate your heater, so don’t let dust insulate your fridge either. Clean coils let your appliance breathe and keep bills predictable.
The longer you wait between cleanings, the harder it is for debris to come off in a single sweep. Catching buildup early builds an easier maintenance habit and reduces time spent each visit.
Keep Energy Bills Low and Fridges Running Smooth with Routine Coil Cleaning
Every refrigerator owner can save energy and avoid repairs by adding refrigerator coil cleaning to their seasonal checklist. The job isn’t glamorous, but its payoff is long-lasting—brighter bulbs, faster cooling, and lighter bills year-round.
Each cleaning knocks down hidden energy waste and lengthens appliance life, all while taking less than fifteen minutes once you’re familiar with your setup. Pair it with other routine chores for the most return on your maintenance time.
Seeing visible dust clear off those coils is a small but powerful victory for your home’s efficiency. Stay proactive, keep an eye out for new buildup, and repeat the routine. Soon, the benefits will become second nature.
Frequently Asked Questions
Plan to clean coils every three to six months, or more frequently if you have pets that shed. Regular intervals keep your appliance working efficiently without risk of overheating or energy waste.
Look for consistently warmer fridge exteriors, longer running cycles, unexplained high electric bills, or frost around the freezer area. Visible dust or pet hair buildup is always a call to clean.
A flexible coil brush and a household vacuum with a crevice tool are ideal. Gloves and a flashlight help with access and thoroughness, but most jobs don’t need expensive or specialized equipment.
Absolutely. Releasing trapped heat lets the compressor work less, reducing mechanical strain and risk of breakdowns. Expect better cooling and greater reliability with every scheduled cleaning.
Cleaning with the appliance unplugged and the door closed will not affect your food. The process is quick, and power loss is too brief to harm refrigerated contents if done promptly.

Simple Lubrication Tips for Sliding Doors
Keep doors gliding smoothly! Follow these simple lubrication tips to fix sticking sliding doors fast. Read on and learn more!


