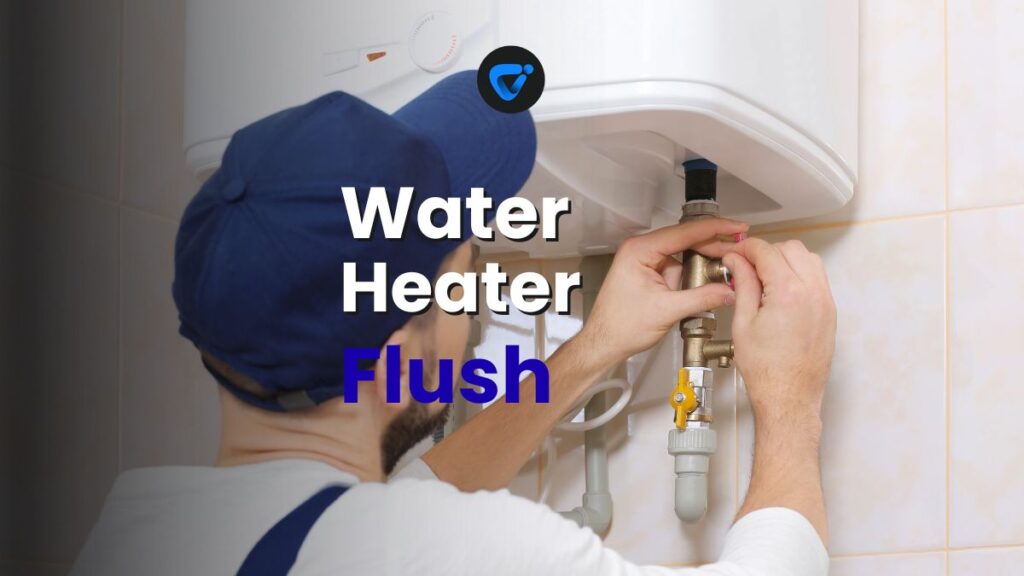
Imagine having hot showers every morning without thinking twice—until your water heater starts making odd noises or struggles to heat. It’s easy to overlook the value of a regular water heater flush, yet it’s a small step that prevents big future troubles.

Preventing Basement Flooding
Keep your basement dry! Discover simple upgrades that stop flooding and protect your home from costly water damage.
Minerals and debris build up inside heaters, slowing performance and stressing parts. This means higher energy bills, shorter appliance life, and lukewarm frustrations. Performing a water heater flush ensures fresh, clear performance every month.
If you’ve ever wondered how simple tasks can add years to your appliances, join in. From daily habits to practical checklists, this water heater flush micro-guide will help safeguard your home comfort.
Identifying Warning Signs Before Starting Maintenance
Spotting early signals of trouble lets you plan a water heater flush before breakdowns happen. Listen for banging sounds when the heater runs or note changes in hot water quality.
Alarm noises from your heater can suggest mineral buildup inside the tank. Pay attention to cloudy water or a metallic taste, as these are practical clues your system needs attention soon.
Sudden Temperature Drops During Use
Picture turning on the tap and, halfway through your shower, the warmth turns icy. When sediment coats heating elements, heat transfer drops and uneven temperatures result. A water heater flush removes these insulators and restores reliable performance immediately.
Clients sometimes say, “It was working fine, and then the water cooled off halfway.” This clear scenario nearly always signals sediment interference. If you feel this drop, plan a flush promptly.
Your first response should be to track how quickly temperatures fluctuate in use. A quick decline indicates sediment covering heating elements, and a flush will immediately offer relief.
Noisy Operation and Tank Rumbling
Loud pops or rumbles point to trapped air under mineral deposits. Each time water heats, these air pockets vibrate violently, rattling the tank. This sound isn’t just annoying; it stresses metal seams, risking costly leaks or tank failure over time.
Remember, ignoring the noise only makes fixes harder. Water heater flush sessions forcibly remove this trapped buildup, restoring normal, quiet functioning.
When clients hear these noises, they often say: “My heater is banging like a drum.” That’s the moment to act and flush everything clean before serious damage appears.
| Warning Sign | Likely Cause | Immediate Action | What to Do Next |
|---|---|---|---|
| Clanging/rumble noises | Sediment buildup and air pockets | Plan a water heater flush | Check for leaks after flushing |
| Cloudy or rusty water | Internal tank rust/sediment | Flush tank, test water afterward | Install filter if needed |
| Inconsistent temperatures | Covered heating elements | Perform a water heater flush | Monitor heat consistency |
| Reduced water pressure | Clogged pipes from sediment | Clear pipes and flush heater | Clean aerators post-flush |
| Metallic water taste | Tank corrosion | Flush tank, check anode rod | Replace anode rod if corroded |
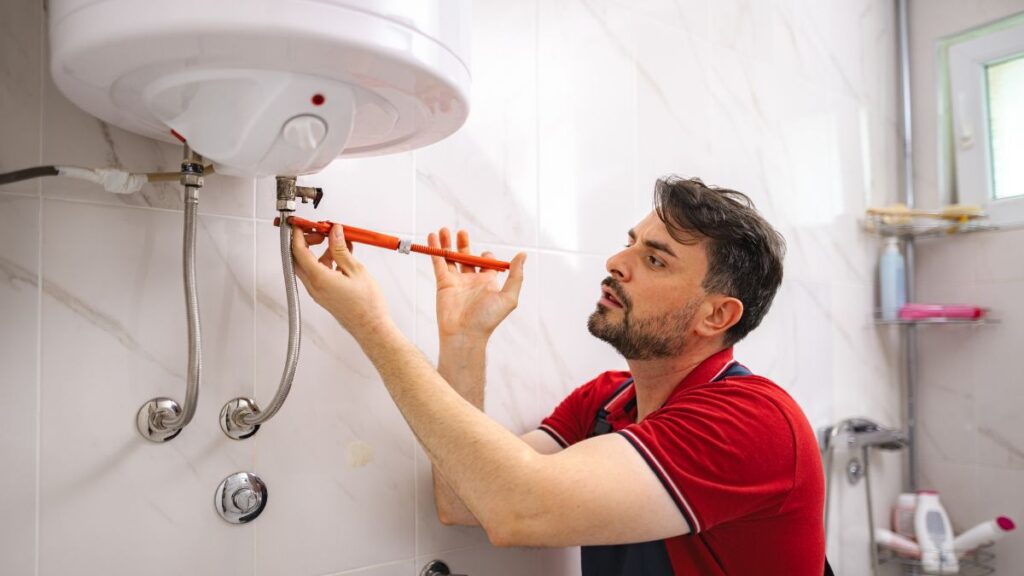
Steps That Bring Lasting Results for Your Heater
Flushing your water heater with a strict routine not only solves these issues but also prevents costly repairs. Following a clear procedure lets you maintain safe, consistent performance reliably.
Most homeowners can manage a water heater flush in under an hour with the right preparation. Keeping tools and instructions on hand, you’ll approach the task with confidence and clarity every time.
Gathering Tools Efficiently
Preparation streamlines every flush process. Lay out a garden hose (long enough to reach outdoors), a standard screwdriver, heat-resistant gloves, a bucket, and a towel for fast cleanup.
- Assemble hose, gloves, bucket, screwdriver, towel before starting. You’ll save time and avoid messy delays.
- Check hose for leaks by filling with water before connecting. Catching leaks early keeps your indoor area dry.
- Position bucket near the drain valve for drips—this prevents floors from getting damp, especially on carpeted surfaces.
- Place tools on a portable tray or caddy. That way you don’t need to hunt down items partway through.
- Lock pets outside your work area—loose animals and hot water don’t mix.
Functional setups mean quicker work and less risk in emergencies. Always double-check your supply list before unscrewing anything.
Once prepared, jump into the main flush procedure to extend your tank’s lifespan and boost daily comfort.
Cleaning Up Safely After Draining
After finishing your water heater flush, immediate cleanup avoids injury and residue. Keep heat-resistant gloves on to handle hot tools or surfaces, even when drained. Pour water from the bucket outdoors, not in sinks, to avoid re-contaminating home drains.
- Place all used tools back on your tray—never leave them by the heater to avoid tripping hazards in tight laundry spaces.
- Wipe the heater’s outer surfaces and nearby floor to remove any remaining mineral dust or water. Ignoring this allows residue to harden and cause scratches later.
- Check that drain valves and connections are dry and tightly closed, reducing potential for residual leaks post-flush.
- Store the hose fully drained and coiled. Worms or bacteria may settle inside if left moist, which can introduce future contamination.
- Hang protective gloves above the heater to keep them handy for quick access at the next scheduled flush.
Immediate cleanup means no accidental slips or injuries in your utility area, setting your routine up for success every time.
Improving Energy Use With Sediment Removal
Stripping sediment from your tank directly lowers energy use. Minerals force heating elements to run double-duty, wasting power. It’s practical to see a water heater flush as a tune-up that pays you back every billing cycle.
Visualize the heater as a pot on the stove. If the pot bottom is coated with burnt food (mineral deposits), heat transfers slowly, wasting energy and producing uneven results. Removing those deposits restores smooth efficiency.
Heating Efficiency Rises After Flushing
Once sediment is gone, the water heats faster and cycles shut off sooner, saving both electric and gas models real dollars. Watch for quicker hot water recovery right after flushing.
In a practical scenario, a homeowner comments: “My hot water seems hotter and comes through quicker since I started routine flushes.” This statement highlights direct benefits you can track after every cleaning.
If your energy bills shrink by a few dollars a month, that’s proof your heater isn’t laboring over a thick mineral crust anymore. Results show up quickly and consistently.
Longevity Gains From a Clean Tank
Gritty sediment scraping the inner lining wears away tank protection, inviting rust and corrosion. By scheduling a water heater flush regularly, you’re taking the same care as cleaning lint traps in a dryer to fend off breakdowns.
Choose a day each quarter—perhaps the first weekend—and pencil in a flush. Fewer emergency calls, fewer leaks, and more years of worry-free hot water will follow.
Actively extending appliance life saves hassle, money, and even water by keeping everything working as designed for years beyond the warranty.
Best Schedules and Habits for Consistent Performance
Building a custom calendar for your water heater flush ensures repeated success, season after season. Reliability grows when these routines become second nature—just like swapping out your HVAC filter.
After every flush, set a phone reminder or note in your utility closet. Add key checkpoints—listening for odd noises, tracing temperature changes, and peeking at draining water clarity.
Seasonal Variations Affecting the Flush Schedule
Homes in areas with hard water build up mineral deposits more rapidly, stretching heater recovery times each winter. Set a stricter water heater flush routine (at least every three months) in these cases for best results.
During holiday hosting or heavy laundry seasons, double-check heaters with a more frequent cursory flush, draining a few gallons as a preventive measure. This stops issues before they spiral into big repairs during busy periods.
Track the effects of each change and adjust your calendar accordingly to match your home’s specific needs—treat it as a living schedule, not a fixed one.
Extra Appliances: When Multiple Heaters Need Care
If your home has more than one water heater—perhaps a basement guest suite or detached studio—create an individualized flush plan for each. Label valves and supply lines to avoid confusion, especially in multi-unit properties or rentals.
Share easy-to-follow instructions with other residents. For example, a laminated flush checklist posted in a shared laundry room prevents skipped maintenance, ensuring everyone enjoys consistent hot showers.
Labeling and Tracking Flushes for Multiple Units
Color-code hoses and stickers on tank fronts to quickly tell which heater is due for care, helping guests or maintenance crews prevent mistakes. Marking flush dates on heaters is a time-saving habit for property managers or families.
Include details like last flush date, next scheduled date, and contact info for shared spaces. That way, caretakers can follow through efficiently, reducing scheduling mix-ups especially in busy buildings.
Encourage all users to jot down heater noises or water color changes in a shared logbook. Early detection and reporting prevents emergency disruptions for all, extending every tank’s lifespan.
Building a Clear Home Maintenance Checklist
A water heater flush fits perfectly inside a larger home maintenance checklist. Encourage adding points like draining laundry traps, checking faucet aerators, and wiping up drips—little actions compound big savings on repairs.
Use analogies: picture cleaning your stove top right after spills, not a week later. Frequent, small tasks keep bigger jobs manageable and less intimidating.
Post your checklist somewhere visible. This habit keeps everyone accountable and helps spread out work, turning a big overhaul into a series of easy wins.
Preventing Common Water Heater Flush Mistakes
Certain missteps can turn a basic water heater flush into a mess or hazard. Understanding what not to do is as useful as knowing what works. Avoiding these errors keeps your system, and your home, protected.
Many homeowners skip turning off the power or gas supply before draining, risking burned elements or unsafe gas emissions. Always double check these essentials before touching the tank.
Filtering Out False Flush Techniques
Avoid viral hacks like adding vinegar to your tank, unless your manual allows. These shortcuts can corrode rubber seals or void your warranty. Stick with draining and refilling for safe, effective cleaning.
Don’t over-tighten drain valves—gentle hand-tight is usually enough. Overdoing it risks damage or tough repairs next time you flush. Stay mindful with every turn.
Using hoses shorter than needed leads to spills or half-finished jobs. Always use a length that clears your living space, ensuring a neat, dry process every time you flush.
Monitoring for Post-Flush Leaks
Even a perfect water heater flush leaves potential for leaks at drain valves or pipe joints. Once the tank is refilled, scan with a flashlight. Any drips signal the need for a valve retightening or new washer installation.
Leave the area dry for a few hours and check again. Sometimes leaks only appear under hot tank pressure, so double-check after a hot shower run.
Fast leak detection prevents seepage becoming water damage or mold, preserving both the appliance’s life and your home’s health.
Conclusion: Your Water Heater’s Best Life Starts Here
We’ve explored how a water heater flush stops sediment in its tracks, lowers bills, and extends comfort. Acting on these tips curbs costly breakdowns and keeps hot water flowing without worry every day.
Routine flushing isn’t just another to-do. It gives peace of mind, delivers real savings, and improves home value. Every checklist item, each quarter’s effort, adds up to years of reliable hot water on demand.
Make your next flush a concrete part of your cleaning routine; add reminders, teach others in your home, and enjoy the rewards of a system performing at its very best—one flush at a time.
Frequently Asked Questions
Most homes do well with a water heater flush every six months. However, if you have hard water or notice noise changes, flushing every three months brings better results and prolonged tank life.
Unusual banging, rapid loss of hot water during showers, or cloudy water from the tap all signal a sediment issue. Address these by scheduling a prompt water heater flush to restore safe and steady performance.
Yes, most basic flushes are simple for homeowners. Always ensure power and gas are turned off before opening drain valves. Wear gloves, use a long hose, and read your owner’s manual for details.
Skipping water heater flushes leads to heavy mineral buildup, poor heating efficiency, rust, leaks, and early failure. Not flushing can mean replacing your tank years earlier than necessary.
Tankless models do need regular flushing to prevent mineral scale from blocking flow and burning out internal parts. Read your heater’s guide, but a yearly flush is usually recommended for tankless systems as well.

How to Replace a Damaged Window Screen Easily
Torn screen? No problem! Learn how to replace a damaged window screen easily and keep bugs out for good. Read on!

