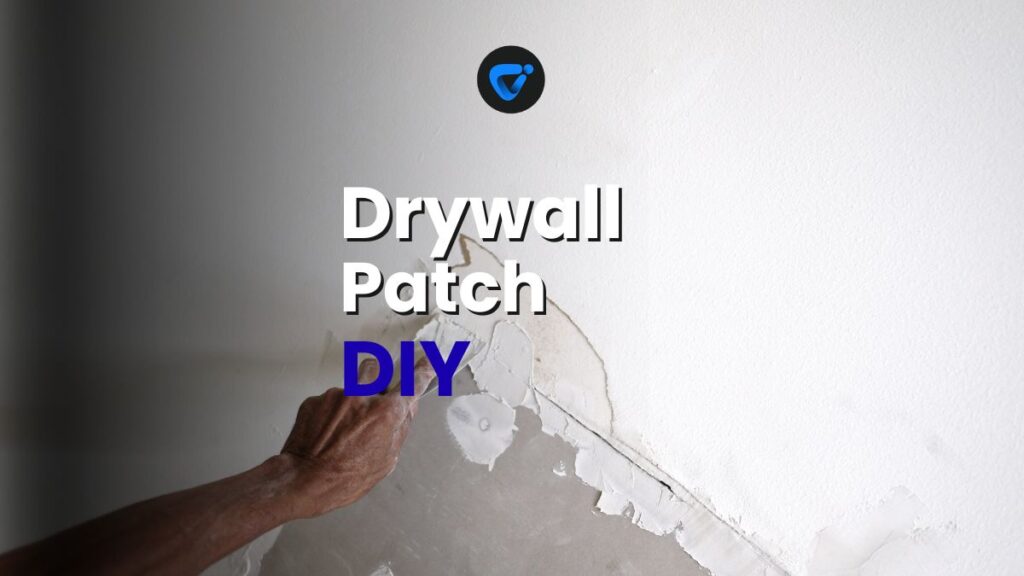
Small holes in your walls can turn a tidy room into something that feels unfinished. If you spot dents or nicks, drywall patching makes quick work of these flaws and restores a clean look.
Quick Tile Grout Repair Without Full Re-Tiling
Fix cracked grout fast! Learn how to repair tile grout without re-tiling for a fresh, durable finish. Read on and learn more!
Wall imperfections occur from door handles, moving furniture, or hanging art. Ignoring them could mean more repairs later. Learning drywall patching not only fixes today’s marks but prevents future headaches by making your living spaces last.
If you want to handle minor drywall patching yourself, this guide dives into step-by-step strategies, realistic tips, and what to avoid. Each section gives actionable detail—let’s start refreshing your home’s look and feel.
Choosing the Right Drywall Patching Materials for Reliable Results
Picking the right supplies ensures your drywall patching sticks, blends, and doesn’t sag or crack later. Follow product rules that work well for small holes in standard drywall found in living rooms and bedrooms.
Plan ahead with a checklist: joint compound, putty knife, sandpaper, primer, and paint. Tackle drywall patching using these hand-picked materials so your repairs blend once finished and last for years.
Assessing Wall Damage Accurately
Hold a flashlight at various angles to reveal dents, punctures, or crumbling paper around the hole. Mark any areas that break apart under gentle pressure—these might need a wider repair zone.
Run your finger along the edge of the hole. If the edges feel soft or flake away, trim the area slightly larger, so the patch has a firm anchor. This step prevents future cracks.
Notice discoloration or moisture stains around the hole. Address any underlying issues first. If ignored, they can cause future damage despite careful drywall patching efforts today.
Comparing Patching Compounds and Tools
Premixed lightweight joint compound is fast for small patches under two inches. It dries in hours, sands smooth, and works with simple putty knives. Spackling paste is best for pinholes and tiny marks.
Paper tape or mesh tape is unnecessary for holes under half an inch. For larger spots, self-adhesive mesh tape can reinforce repairs and stop cracks at the seams. Opt for flexible putty knives—metal blades give precise coverage.
Always choose fine- or medium-grit sanding sponges for prepping and feathering repaired areas. Avoid extra-coarse grit, which can gouge fresh patches and sharpen the repair’s edge.
| Material/Tool | Best Use | Prep Time | When to Choose |
|---|---|---|---|
| Lightweight Joint Compound | Small-to-medium holes | Minimal (premixed) | Most interior patching |
| Spackling Paste | Pinhole/nail holes | Minimal | Quick spot fixes |
| Mesh Repair Patch | 1–4 inch holes | 1-2 minutes | Added strength for wider damage |
| Putty Knife (2–4 in.) | Applying/smoothing | None | Detailed and small patches |
| Fine Sanding Sponge | Smoothing finish | None | Final blending for paint prep |
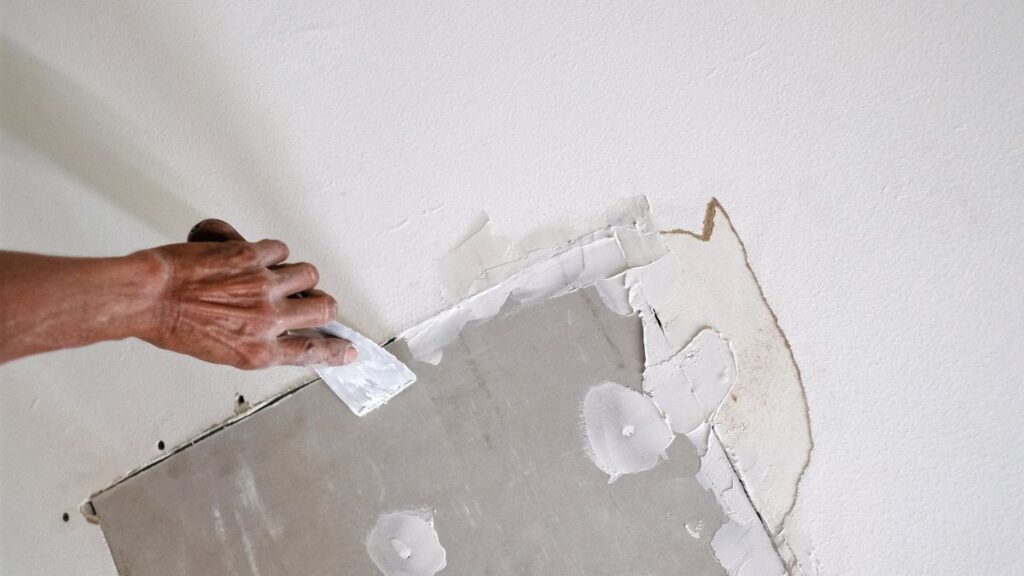
Prepping the Wall: Steps That Prevent Future Problems
Effective drywall patching starts with a dust-free, solid surface. Jumping ahead without this groundwork leads to obvious seams and repairs that don’t last. Prepare the wall so your fix lasts and looks invisible later.
Before work, lay down plastic sheets or newspapers below the damage for fast cleanup. This defense stops drywall dust from drifting into carpets or furniture fabric as you sand or cut.
Cleaning and Trimming the Area
Use a utility knife to slice away any loose drywall paper or crumbling areas. Gently trim just beyond the damage for a solid, square repair zone.
Dab a damp cloth around the patch site. This pulls up dust and dirt so the joint compound sticks better. Let the surface dry naturally before moving forward with drywall patching steps.
If adhesive from removed tape lingers, rub the area with a touch of rubbing alcohol. Sticky residue will repel compound, causing bubbling or flaking down the line—careful prep prevents this issue.
- Vacuum directly around the patch site to catch hidden debris and dust for a clean bond later.
- Sand lightly with medium grit to scuff the surface for stronger compound adhesion—skip this, and you’ll notice peeling after painting.
- Mask off baseboards or trim nearby for straight, tidy compound lines; this guarantees your paint blends evenly during touch-up.
- Check humidity; patch on dry days so repairs set and cure without swelling—excess moisture delays finishing work and weakens patches.
- Bag and remove dust rather than sweeping, so fine particles don’t settle back on your clean patching area or floors.
Every step adds up to a surface that lets patching compound cling smoothly, letting you sand and finish seamlessly for a flawless effect.
Patching Supplies at the Ready
Set out every tool you’ll use—joint compound, spatula, spare blades, sanding blocks—on a tray or small box for easy reach. This prevents searching mid-project and helps compound go on before it dries out.
- Open tubes of compound just before use, so contents remain fresh and easy to spread; fast-drying putty sets up if exposed too long to air.
- Organize tools by order of use (trimming, cleaning, patching, sanding) to reduce overlap on surfaces and keep your workspace tidy.
- Prep a small bowl of clean water if you’ll need to wipe offsets or sticky compound from your fingers between steps.
- Double check that your sandpaper or sanding block hasn’t worn down—dull abrasives make blending difficult and will show up after painting.
- After setup, give your hands a quick wash to keep sweat and oils from contaminating the repair area.
Thoughtful organization at the start means your attention stays on quality drywall patching, leading to cleaner, professional-looking results.
Step-By-Step: Filling Small Holes for a Seamless Finish
Rolling up your sleeves to patch a hole brings instant satisfaction when the repair vanishes under a fresh coat of paint. Drywall patching gets easier—if you commit to each step as outlined in this real-world walkthrough.
If you’re dealing with screw holes, dings, or small gaps, following this path gives you a result that doesn’t crack, shrink, or stick out against the rest of the wall.
Applying the Compound Right the First Time
Scoop a small amount of joint compound on your clean putty knife. Press it firmly over the hole, angling the blade so the excess spreads outward like icing a cupcake.
Work from the center outward, feathering the edges using light, even pressure. Remove thick build-up at the borders; a razor-thin border ensures an invisible blend after sanding and painting.
If the filled spot dips as it dries, reapply a second thin coat instead of overloading the first round. Allow each coat of compound to dry fully between applications, and rest your tools on a paper plate.
Sanding Down for an Invisible Repair
Once fully dry, rub the patch with a fine-grit sanding sponge (use gentle, circular motions). Listen for squeaks as the bump fades; stop when the patched space feels flush and looks dull like plain drywall.
Wipe the area with a tack cloth or slightly damp rag to lift remaining powder before moving to priming the repaired wall. Any lingering grit will ruin the next layer’s smoothness.
Run your fingertips over the repair with your eyes closed; you shouldn’t feel a ridge between the original drywall and patched spot. Repeat sanding if any sharpness or lumpiness remains.
Color Matching and Paint Blending for Unnoticeable Repairs
Painting over a small patch shouldn’t stand out from the rest of your wall. With the right approach, color and sheen will match so closely that guests won’t spot your drywall patching repairs.
Prime first using a water-based drywall primer. Paint from the center outward with a small foam roller or brush, feathering the color into surrounding areas. Test a dry patch under various lighting to confirm a seamless appearance.
Selecting a Paint Sample That Truly Disappears
Trim paint chips directly from your wall for the most accurate color match. Bring these pieces to a paint counter for custom mixing rather than guessing from color cards alone.
If you saved leftover paint from the original job, stir thoroughly—even old paint separates by pigment over time. Strain any clumps so your application remains smooth and even across the drywall patching area.
Switch lighting between warm and cool bulbs while you test color spots—what looks perfect in sunlight might clash under soft interior lamps. Use these lighting checks before committing to a full coat.
Finishing Tactics for Subtle Sheen Matching
Match the paint’s finish to the wall’s original: if the wall is eggshell, avoid satin or gloss, as each bounces light differently and can reveal patch boundaries from an angle.
Feather the paint using smaller, outward strokes as you approach the edges. If you overlap evenly, the eye can’t pick out where new paint ends and old begins—even after drying. Wait for complete drying before evaluating the result.
For high-traffic spaces, repaint the whole wall if the patch remains visible. Hallways and entries capture more light, making even well-executed drywall patching repairs stand out unless fully blended.
Consistent Results: Following Safety and Cleanliness Habits
Reliable drywall patching comes from clear safety steps and neat habits. Following these protects your hands, lungs, and home interiors from exposure to dust and sharp tools throughout your patching process.
Keep a mask handy and slip-on gloves ready before you cut or sand. Wash tools in a bucket, not the sink, to avoid clogged plumbing. These routines—repeated every time—minimize future repairs from avoidable mistakes.
- Wear safety glasses during trimming to block small bits from flying at your eyes, especially when snapping away ragged drywall edges.
- Change gloves if moving between patching and painting; oil or pigment on bare hands transfers to the wall and disrupts compound adhesion.
- Lay down a drop cloth in high-traffic areas to shield floors and furniture from dust; shaking it outside afterward removes fine debris swiftly.
- Keep a damp rag nearby for immediate cleanups, especially if compound or paint splatters land on nearby surfaces during drywall patching.
- Store half-used compound tightly sealed and away from heat to prevent premature drying—a tight lid is as crucial as anything else for quality repairs next time.
Clever Fixes for Tricky Drywall Patching Situations
Patching near corners, outlets, or old repairs? Adjust your drywall patching method so fixes hold and blend, even in tough spots. These workarounds save time and prevent expensive redos down the road.
When damage runs into trim or molding, tape off the wood edge using painter’s tape. Fill carefully with a narrow putty knife, then peel tape for a sharp repair line—a trick that matches original construction.
Reinforcing Weak Areas Without Overbuilding
For fragile drywall, press the putty knife flat and fill in thin layers rather than one thick application. Each new coat anchors deeper into the original wall, making a lasting repair.
If holes recur in the same area, use a mesh patch underneath your joint compound for added stability. This prevents thumb-sized gaps from reopening due to temperature swings or minor bumps.
Fill around electrical outlets by removing the cover plate, patching in small batches, and letting each dry before sanding. Replace the plate only after priming and painting for a perfect border.
Repairs Over Painted, Textured, or Stained Surfaces
Slightly rough up shiny paint or gloss with sandpaper, so patch compound adheres well. Shiny paint resists new coats, so this step avoids peeling or cracking patches.
For textured walls, don’t smooth the repair entirely—blot with a clean sponge while compound is wet, or use a stipple brush. Matching the old wall’s look keeps the repair invisible even close up.
If stains bleed through after patching, use stain-blocking primer before painting. This blocks yellow or brown marks that raw primer can’t cover, guaranteeing professional-grade drywall patching results every time.
Proactive Maintenance: Keeping Drywall Patches Discreet Forever
Simple habits keep patched spots from showing up again, especially if you repeat drywall patching in the same spots over time. Do these steps after every project to preserve a flawless look for years.
Walk the room two weeks after drywall patching and lightly run a flashlight over old repairs. Even with solid work, high-traffic areas may pick up new marks—a fast check lets you touch up before issues worsen.
- Keep leftover touch-up paint covered and labeled by room, so color matches remain on hand for small spot fixes between deep cleans or furniture shifts.
- Write patch dates on a room checklist. Marking repair dates helps trace causes—like heavy door swings—or reminds you to inspect trouble spots each season.
- Install soft rubber bumpers behind doors to prevent future drywall punctures—a simple addition that eliminates repeat patching over the years.
- Spot-vacuum dust from patched areas every few months; accumulated powder dulls paint and spotlights texture differences that weren’t visible during repair.
- If a wall section gets bumped and cracks reopen, gently scrape loose material and re-patch using your original drywall patching technique instead of ignoring it.
As habits form, you’ll spot and handle fresh flaws confidently, turning DIY drywall patching into second nature for every room you care for.
Bringing It Together: Smart DIY Drywall Patching Locks In a Neat Home
Taking charge of drywall patching transforms home flaws into quick, manageable fixes. Armed with joint compound, putty knives, and care, your hard work smooths dents and holes so walls look crisp again.
Each measured step—from prepping to blending paint—ensures repairs blend right in. Maintaining your patches keeps your spaces neat, reflecting the care you invest in each room day to day.
Consistency is the secret—repeating these drywall patching techniques means less time worrying about dings and more time enjoying a tidy, resilient space. Your efforts build a home that feels new long after the final patch dries.
Frequently Asked Questions
For holes under 1/2 inch wide, joint compound by itself is strong enough. For anything between 1/2 inch and 2 inches, use a mesh patch beneath the compound. Larger holes call for paper patches or even a replacement drywall piece. Drywall patching products explain their ideal hole size ranges right on the label.
Perfect matches are possible, but lighting, wall age, and paint mixing affect the final color. Always feather paint outward from the patch. A primer coat prevents color bleed and blends old and new areas smoothly for best results. Test color in daylight before painting the full patch.
Small drywall patching jobs with mesh reinforcement and full drying are strong for light traffic. However, repeated hard hits can eventually weaken even the best repair. Add doorstops or furniture pads to limit new damage in those areas.
Wait until joint compound is fully dry—typically 24 hours, longer in humid rooms—before sanding and priming. Paint on compound that’s even slightly damp may peel or bubble, ruining an otherwise invisible patch.
For small areas, sanding is best reserved for after the final coat, but a very light brush with fine sandpaper between coats will remove small ridges and make the final finish much smoother. Avoid oversanding, which can gouge the patch and create extra work.

Preventing Basement Flooding
Keep your basement dry! Discover simple upgrades that stop flooding and protect your home from costly water damage.

