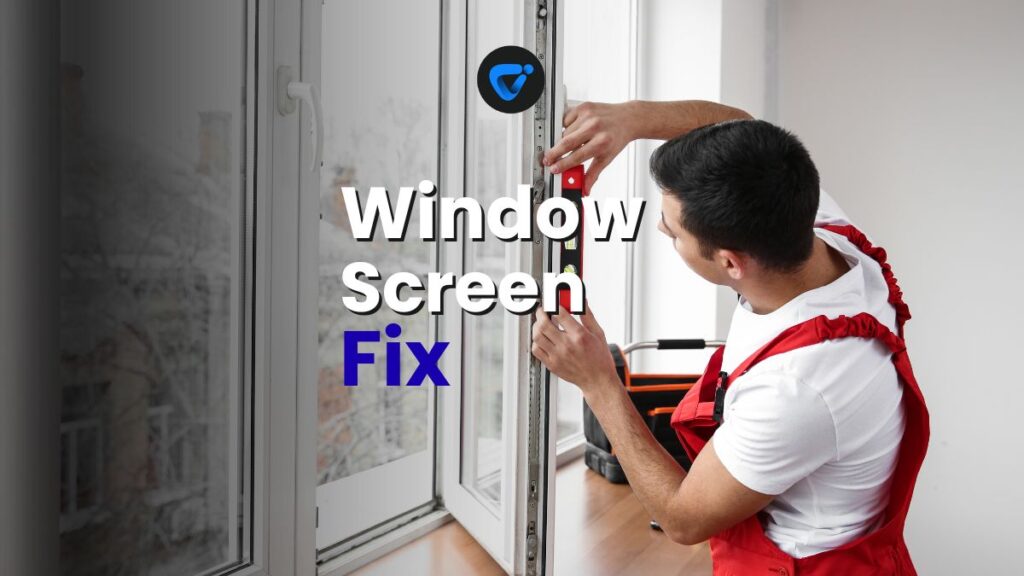
A torn or sagging window screen can be distracting and let in unwanted pests, affecting comfort and air quality. Tackling window screen replacement at home transforms this pesky problem into a quick, satisfying win.

Quick Tile Grout Repair Without Full Re-Tiling
Fix cracked grout fast! Learn how to repair tile grout without re-tiling for a fresh, durable finish. Read on and learn more!
Relying on a professional for every minor repair isn’t practical or budget-friendly. Understanding window screen replacement equips you to keep your home secure and breezy while lowering maintenance costs over time.
This article invites you to explore clear, step-by-step advice and practical examples collected from real-world home maintenance experience. Learn the right techniques, best tools, and clever shortcuts that make window screen replacement straightforward, even for complete beginners.
Gather The Right Tools To Start With Confidence
Having the right tools at your fingertips ensures your window screen replacement project begins smoothly and avoids frustrating delays. Lay everything out before starting to work efficiently and stay organized.
Preparation wins half the battle. From a sharp utility knife to spline rollers and sturdy replacement screens, assembling these essentials keeps interruptions away and builds momentum for each step that follows.
Spotting Quality In Your Tools and Materials
Choose a replacement mesh advertised as tear-resistant. When shopping in-store, hold a sample up to the light — denser, evenly woven fabric prevents pests from slipping through and lasts longer in everyday use.
Spline material must match the groove size on your window frame. A too-thin spline allows slack, while one that’s too thick becomes tough to press in place. Measure your existing spline or bring a small piece when purchasing replacements.
The spline roller’s grip should fit your hand securely. Opt for double-wheeled rollers—one side rounds, one flat—for control and snug mesh installation. Prioritize solid construction to avoid awkward rolling or hand fatigue.
Keeping Your Workspace Ready and Tidy
Add a wide, flat work surface to your toolkit list. A collapsible table, card table, or clean garage floor gives you clear sightlines and minimizes the risk of misalignments in your window screen replacement project.
Keep a small bucket or tray for screws, clips, and screen tabs. Sorting hardware as you remove it from the old frame helps you finish faster later without hunting for tiny parts scattered across the floor.
Wear gloves if working with sharp wire mesh, and keep paper towels or rags nearby to wipe away grime. Staying organized and clean means less frustration and quicker, safer hands-on progress throughout the repair.
| Tool/Material | What It Does | Common Mistake | Pro Tip |
|---|---|---|---|
| Utility knife | Cuts old and new screen precisely | Using dull blades causes frayed edges | Snap off for fresh blade every 2-3 cuts for cleaner results |
| Spline roller | Presses spline & mesh into window frame groove | Wrong wheel shape reduces fit | Use rounded wheel first, flat wheel for final pass |
| Replacement screen | Provides bug-proof barrier | Wrong mesh size lets bugs in | Choose mesh labeled “insect screen” for reliable coverage |
| Spline | Secures screen in frame channel | Incorrect diameter sags or splits groove | Match old spline’s thickness and bring sample to store |
| Screwdriver | Removes/reinstalls window tabs and hardware | Forcing tool strips screws | Use correct tip and size for snug, safe removal |
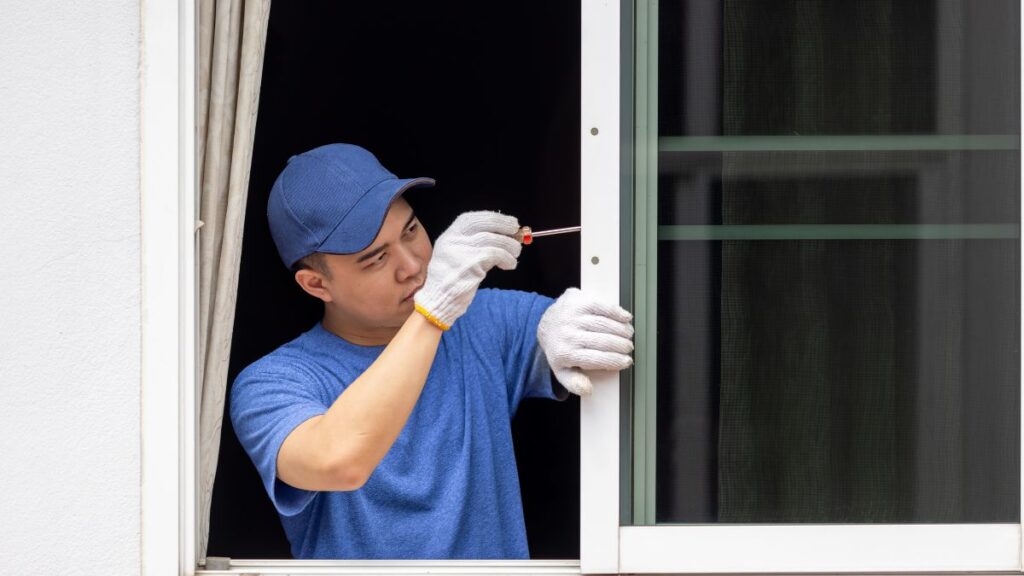
Removing the Old Screen Safely and Thoroughly
Removing your old window screen with care keeps your frame intact, setting you up for a secure replacement. Work slow and steady — rushing can cause damage that complicates the process.
Begin by carefully prying up any clips, tabs, or screws securing the window screen frame. Store these fasteners in a small container to avoid losing them during replacement.
Freeing the Spline for Mess-Free Screen Removal
Insert the tip of a flat screwdriver under one edge of the spline, gently prying up a few inches. Grip with steady, even pressure to avoid nicking the frame or tearing the screen fabric.
Once started, peel the entire spline out slowly — you’ll notice the mesh relax away from the groove. If the spline cracks or splits, discard it so it doesn’t compromise the new install.
Pull the old mesh out of the frame channel in one smooth motion, brushing away dust or debris. Lay the cleaned frame on your work surface for the next steps in window screen replacement.
- Work from one corner and move around the frame, instead of yanking across, to avoid bending the edges or snapping fragile frame material.
- Use gloves when handling sharp mesh edges — cuts from old screening can be unpleasant, especially on dry skin.
- Clean the groove of any mud or cobwebs before installing new mesh; leftover debris prevents the spline from locking in securely and leaves bumps in the finished product.
- Check the frame for cracks or loose corners while it’s exposed. If necessary, gently tap with a rubber mallet or add a small dab of epoxy for reinforcement.
- Lightly brush the cleaned groove with a dry toothbrush to ensure a snug, professional-looking spline fit and to make installing the new window screen replacement much easier.
Take your time during removal. Preserving the frame’s condition now pays off by making each subsequent step work more smoothly and look more professional.
Inspecting The Frame For Damage Before Reinstalling
Once the old screen is clear, angle the frame toward a window and look for small bends, chips, or splitting in the corners. Subtle flaws impact the strength of your finished window screen replacement.
- Address minor bends by gently pressing with pliers wrapped in cloth — this protects the finish and maintains the straight edge needed for a snug screen fit.
- Reinforce loose joints with a dab of clear epoxy or fast-drying craft glue applied to the inside corners. Wait for full curing before continuing with new materials to ensure lasting results.
- For missing hardware, visit your local hardware store for generic replacement clips or screws. Bring old pieces to match size and type accurately for a worry-free reinstallation step.
- Double-check that all tabs or springs are reattached before proceeding. Missing hardware later can result in rattling screens or security problems down the line.
- Keep a trash bin nearby for old material – tossing it immediately declutters your workspace and clears the way for an efficient window screen replacement.
A strong, square frame paired with a perfectly clean groove ensures your new screen stretches smoothly and stays locked in place for years of use.
Cutting and Fitting Your New Screen Like a Pro
Precise cutting and tensioning guarantee a snug, ripple-free finish in your window screen replacement. This is where patience and steady hands truly pay off.
Lay your new mesh over the frame, leaving an extra inch on every side. Press the mesh lightly so it hugs all corners before making any cuts or using spline.
Managing Tricky Corners with a Simple Sequence
Bend the mesh gently around each corner, holding it with painter’s tape or a small clamp. Start on one edge, unrolling the spline and pressing it in as you go.
Keep tension with your non-dominant hand, working slowly down the first side, rolling the spline into the groove. Repeat along two adjoining sides, keeping the mesh taut but not stretched so tight it warps.
Use scissors or a utility knife to trim excess mesh within half an inch of the groove before completing the fourth spline side. This prevents the blade from slipping under tension and provides a crisp, professional edge.
Addressing Mesh Wrinkles During Spline Insertion
If wrinkles appear as you press in spline, gently lift the screen in that area and stretch it flat by hand. Backtrack slightly and reset the spline for a smooth result.
Don’t push too hard — steady, gentle pressure is key. Blisters or calluses can become an issue if gripping the roller handle too tightly, so change hand positions as needed.
Once all four sides are in place, double-check the entire screen for tension. A guitar-string tautness indicates you’re on track for a truly resilient window screen replacement.
Trimming Excess Mesh and Finishing for Lasting Results
Final trimming gives your window screen replacement a professional touch without snags or loose edges. This small detail is easy to get right if you work with intent.
Hold your utility knife at a low angle, pressing gently against the outside edge of the frame groove. Slide it steadily along each side, using short strokes to minimize fraying.
Easy Edge Cleanup for Added Lifespan
Check for any stray threads hanging past the spline and snip them with sharp scissors. Frayed bits can unravel over time, making the screen look aged well before its time.
Blow or brush away loose fiber scraps before reinstalling the screen frame. A soft paintbrush helps avoid transferring moisture or lint onto the new mesh, which can attract dust.
Run your fingers along the finished groove to check for missed spots or loose areas. If the spline skips any sections, use the roller for a final once-over. Repair these quickly for optimal bug and dust resistance.
Reinstalling with Security and Smooth Operation
Securely reinstalling your new window screen replacement guarantees long-term performance and peace of mind. Getting tabs, locks, or hardware in place prevents accidental fallouts or rattling.
Lift the finished frame to the light and double-check for slack spots, gaps, or bulging before carrying it back to the window frame. Confirm fit by dry-setting the frame lightly before fastening everything.
Lining Up and Securing Each Corner
Set the top edge of the frame into position first, then tilt the bottom in place, using light pressure. For side-loaded hardware, slide one end in and torque the frame gently side-to-side for alignment.
Fasten tabs or screws as needed, holding the frame securely with your non-dominant hand to prevent slippage. Use a screwdriver at a comfortable wrist angle to avoid stripping delicate screw heads.
Test movement by opening and closing the window. Listen for scraping or resistance. If necessary, loosen and retighten hardware or nudge the frame with a rubber mallet for final adjustments.
Quick Fixes and Common DIY Challenges Solved
Encountering stubborn problems during window screen replacement is common, but nearly every hiccup has a fast fix. Stay calm and patient for the best outcome.
Slight gaps or puckered mesh can result from uneven tension, misaligned spline, or accidental debris. Address these before finishing the job for lasting satisfaction.
Mini Checklist for Common Issues
Go through these fixes one by one to troubleshoot while you work. Even seasoned DIY fans run into these — persistence is the secret sauce of successful home maintenance.
- Reset mesh and spline if ripples resist smoothing; pull spline back a few inches and gently retension mesh, working in new sections as needed.
- If spline won’t stay put, double-check for leftover debris or mismatched diameter; swap for a proper fit and retest with short spline offcuts first.
- Address stubborn corners by folding mesh at a slight 45-degree angle before inserting spline; this keeps material tight and corners from popping loose over time.
- Quit if fatigue or frustration sets in; returning refreshed with clear eyes prevents mistakes and keeps hands steady for precision work.
- If you slice the mesh accidentally, patch with clear repair tape or start a new sheet — rushing repairs rarely creates lasting results in window screen replacement.
Extra Tricks Homeowners Swear By
Use painter’s tape to hold mesh in place temporarily — it peels away cleanly and allows quick repositioning if you need to start over mid-way through a window screen replacement.
Keep spare mesh scraps; they double as garden netting, patch material, or storage bin liners. Recycling leftovers keeps your toolkit well-stocked and creative for future fixes.
Document your process with a few quick photos — it’s helpful for referencing frame orientation, hardware placement, or confirming fit before trimming excess material.
Everyday Habits That Extend Screen Life and Appearance
Careful use and seasonal cleaning maintain new screens for years, minimizing the need for frequent window screen replacement. Develop simple routines to keep mesh clean and the frame secure.
- Vacuum screen surfaces gently with a brush attachment every month. Loosened dust and pollen build up over time, making air and light penetration harder and dulling overall appearance.
- Check spline fit at seasonal changes. Warped or loose sections let bugs in and point to premature wear; press with a spline roller or small blunt tool to reseat edges.
- Clip or trim any loose threads with sharp sewing scissors. Clean edges deter fraying and discourage insects from nesting between mesh and frame, reducing the urge for early window screen replacement.
- Lock window tabs, handles, or latches after cleaning. Secured fasteners stop vibration and reduce stress on the frame, especially in windy or rainy conditions.
- Flush minor bird droppings or debris with a spray bottle of water and a soft cloth. Avoid harsh chemicals — they can eat through mesh coating and shorten lifespan noticeably.
Small acts of care, done consistently, help your hard work last and signal to guests that your home maintenance runs smoothly in every detail.
Wrapping Up Your DIY Window Screen Replacement Journey
Fresh window screens brighten your home and improve air quality, making every room more inviting. With the right approach, window screen replacement becomes routine maintenance you’ll look forward to completing.
Mastering this simple skill yields measurable savings, builds DIY confidence, and ensures your living space remains pest-free and comfortable. Routine window screen replacement keeps repairs predictable and stress-free for years to come.
View each project as an investment in comfort and cleanliness. The steps here unlock a smoother home cleaning and maintenance routine — all from a micro-guide grounded in practical detail, real examples, and hands-on solutions.
Frequently Asked Questions
Check for holes larger than a pencil tip, sagging mesh, or cracks in the frame. If simple patching can’t restore security and airflow, it’s time for full window screen replacement.
Choose pet-resistant mesh made from thicker fiberglass or coated polyester. These stand up to claws and active families better than standard mesh, requiring less frequent window screen replacement.
Yes — intact mesh scraps work as garden protectors or workbench liners. Squared-off frames can double as plant supports or be used to try new window screen replacement techniques before tackling visible windows.
Most first-timers spend 30–45 minutes from start to finish per screen. As you get comfortable, window screen replacement speeds up — experienced hands often finish in under 20 minutes per window.
Monthly vacuuming, trimmed threads, and seasonal checks of spline tightness keep the new screen securely in place and clean. Regular care keeps window screen replacement cycles farther apart and extends lifespan significantly.

How to Tighten a Loose Stair Railing
Fix wobbly railings fast! Learn how to tighten a loose stair railing safely for secure, lasting results. Read on!

