Nobody enjoys the screech of a squeaky door. The shrill sound disrupts the calm of any home and sparks an immediate urge for a squeaky door fix, especially during quiet hours.

How to Tighten a Loose Stair Railing
Fix wobbly railings fast! Learn how to tighten a loose stair railing safely for secure, lasting results. Read on!
Whether it’s the bedroom, bathroom, or entryway, persistent squeaks signal worn hinges or stubborn buildup. Letting them linger can fray nerves and mask underlying maintenance issues.
This step-by-step guide tackles squeaky door fixes using everyday items stashed in kitchen drawers or utility cupboards. Discover practical, fast solutions for lasting results and smoother, more peaceful daily routines.
Tackling Door Squeaks with Items Already at Home
Every household has products capable of a straightforward squeaky door fix. Simple solutions can deliver substantial, immediate relief with items you rarely associate with door repair.
You don’t need special skills or a toolbox loaded with hardware to address basic hinge noise. Instead, quick wins start with materials like cooking oil, soap, or wax right in your pantry.
Testing Door Movement for Squeak Location
Start by gently opening and closing the suspect door. Listen closely to pinpoint which hinge groans or if the sound comes from misaligned hardware near the latch area.
If the squeak rings only when a certain part moves, touch the door there and note exactly where friction or catching occurs. This speeds up your squeaky door fix.
Marking problem areas with painter’s tape or chalk ensures you treat the precise spot, not the entire hinge, so your home cleaning & maintenance micro-guide remains on target.
Assessing the Type of Squeak
Some hinges emit a metallic creak, while others give a soft grinding or high-pitched whine. Each type can benefit from a unique squeaky door fix method based on everyday items.
A metallic screech means dry, possibly rusty metal. A muffled noise may indicate built-up grime or misaligned parts. Different squeaks need tailored solutions, from oiling to cleaning.
Jot down the sound profile and hinge condition. That one-minute inspection narrows your household fix choices and spares you guesswork later.
| Household Item | Lubricates | Cleans | Best for |
|---|---|---|---|
| Cooking Oil | Yes | No | Metal-on-metal noise |
| Petroleum Jelly | Yes | No | Stubborn hinge areas |
| Candle Wax | Yes | No | Temporary fixes |
| Dish Soap | No | Yes | Removal of grime/grit |
| Baking Soda & Water | No | Yes | Stain and residue removal |
Step-by-Step Application: Getting Rid of a Squeaky Hinge
Focus on swift, effective methods when using household staples for a squeaky door fix. Restore quiet to your space without specialized sprays or tools.
Once the trouble spot is marked, ensure the area is accessible and your supplies are within reach. This supports a smooth application and keeps your process frustration-free.
Simple Application of Cooking Oil
Dip a cotton swab into vegetable or olive oil. Dab the tip on the hinge pin, then slowly work the door back and forth to distribute the lubricant.
A small piece of paper towel tucked under the hinge protects the floor from drips. If the squeak lingers after three to five swings, repeat the process for a more enduring squeaky door fix.
Wipe excess oil off the hinge exterior to prevent dust from sticking and avoid over-lubricating adjacent surfaces.
- Apply oil sparingly to prevent sticky buildup, which can attract grit and turn a small squeak into a messy repair.
- Work the door in small increments after application, so oil moves into the pin rather than spilling outside the hinge area.
- Remove the hinge pin for more direct access if the first application fails—gently tap with a screwdriver, but avoid scuffing surrounding paint.
- Use disposable gloves to avoid slippery hands during and after your squeaky door fix.
- Inspect the cleaned area afterward, ensuring the door swings smoothly without a trace of resistance or fresh residue.
Many homeowners use actual scripts like: “I just rub the oil over the pin, then listen for the squeak as I move the door.” This next-level attention eliminates repeat annoyances.
Routine for Cleaning Before Lubrication
Remove surface dirt with a microfiber cloth. Mix mild dish soap with warm water, dip a cloth, and clean hinge faces before applying any lubricant or wax.
Check hinge pin and plates for hardened dust or adhesive residue. Gently scrub these areas using a toothbrush or cotton swab, especially if prior attempts at a squeaky door fix failed.
Wait until hinges are fully dry before adding oil, jelly, or wax. Moisture left behind can dilute your lubricant and reduce its staying power.
- Always scrub carefully—aggressive motions scratch finishes and worsen future squeaks by exposing raw metal.
- Dry the immediate area thoroughly, especially on painted or varnished doors, to avoid peeling or bubbling near the hinge line.
- Clean nearby doorknobs too: fingerprints often streak onto hinge plates and transfer grime when doors are repeatedly pushed or pulled.
- Finish with a dry buff using a soft rag to capture stray soap or debris invisible to the eye.
- Confirm with a fingertip check—no sticky or slippery residue means you’re ready for the next squeaky door fix step.
Consistency across these fine details makes a long-term difference in hinge performance, and soon, the infamous squeak becomes a memory.
Everyday Items for Squeaky Door Fixes: Choosing the Right Solution
Choosing the right item hinges on door type, hinge material, and severity of squeak. Not every household staple works for each scenario, so notice subtle differences before jumping in.
Think of a squeaky door fix like matching the best seasoning to a dish: a touch makes the result perfect, but overdoing it creates new problems or messy residue.
Cooking Oils vs. Wax for Hinges
Cooking oils like canola or olive provide quick lubrication but may go rancid in humid climates. Use for interior hinges where the smell won’t offend or attract pests.
For outdoor doors, beeswax or paraffin from an unscented candle provides more durable squeaky door fix. It holds up under temperature changes and resists dust buildup better than edible oils.
If using wax, remove the hinge pin and rub the end with the candle. Reinsert and move the door several times to spread the wax evenly along the entire hinge length.
When Petroleum Jelly Works Best
Petroleum jelly offers long-lasting lubrication and clings to metal surfaces without dripping. Use a small amount on internal hinges and work it in as the door swings back and forth.
This option feels solid if you want a mess-free, reliable squeaky door fix for rarely used doors. Avoid excess product as it may squeeze out when the door is closed repeatedly.
To prevent fingerprints, employ a cotton swab to coat grooves in the hinge or pin, then let the jelly settle before heavy use.
Choose based on your door’s material, location, and exposure. The right product saves repeated repairs and preserves peace at home.
Addressing Hidden Causes: Beyond the Obvious Squeak
Some squeaky door issues have roots beyond dry hinges. Look for warping, misalignment, or loose screws that undermine even the best squeaky door fix efforts.
A door that grinds against the jamb or drags near the floor often signals bigger structural issues, prompting you to check frame and hardware closely.
Diagnosing Door Fit Issues
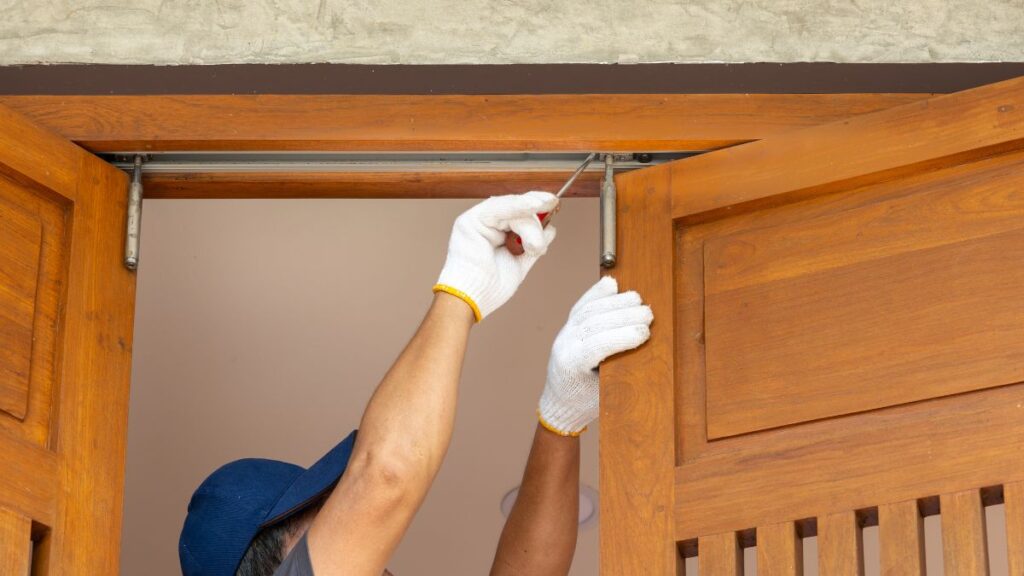
With the door almost shut, press the top edge to check for movement. Excess wiggle means hinge screws are loosening or the door itself is warping subtly over time.
If you feel scraping along the frame, adjust the hinge by tightening mounting screws. For stubborn shifts, loosen both upper and lower screws, reposition the hinge, then tighten again for better fit and a comprehensive squeaky door fix.
Listen after tweaking. Clean movements confirm your work, while recurring noise directs your focus elsewhere—possibly to a deformed hinge or out-of-square door slab.
Pin Replacement When All Else Fails
Old or bent pins can create squeaks that resist every DIY fix. Tap the pin out with care and inspect for nicks, bends, or rust that blocks smooth action.
If so, visit a hardware store for a direct match replacement or contact the door’s manufacturer. This hands-on squeaky door fix overcomes deep-seated friction and extends door lifespan.
Slide the new pin into place, then repeat lubrication for best performance—even with fresh hardware, a dab of cooking oil or wax establishes easy, noiseless action from the start.
Preventative Habits for Long-Term Door Silence
Consistent upkeep eliminates surprise squeaks and preserves your door’s finish and hardware. Mark a calendar for regular checks and cleaning to sidestep a last-minute squeaky door fix altogether.
Like changing air filters or testing smoke alarms, making door care part of your monthly or seasonal routine keeps your home always inviting—no ear-piercing noises interrupt quiet hours.
Maintenance Checklist for Quiet Doors
Start by feeling for rough movement or pops as you open and close each door. Next, visually inspect hinges for dust, rust, or leaks at contact points.
Clean hinge faces, apply a fresh coat of your preferred household lubricant, and adjust loose screws with a handheld screwdriver on the spot. Always check adjacent surfaces for stray drips or fingerprints before moving on.
Work through your home, one hinge at a time, and record any repeat offenders in a maintenance log—this steers future squeaky door fix sessions with precision.
Simple Habits for Lasting Results
Encourage family or roommates to flag doors that start to complain during daily routines. Early reporting lets you act quickly before full squeaks develop and disrupt the household.
Wipe door edges as part of weekly cleaning, paying attention to corners where dust collects and can drift onto hinge pins. This preventive step cuts down on cleaning time, too.
Try “door day” twice a year: tackle all hinges at once, making the task efficient and memorable—no disruptions until your next scheduled round. Your quiet home stays peaceful longer.
Summing Up Your Squeaky Door Fix Journey
Every squeaky door fix starts with careful observation and ends with a sense of accomplishment. Using items from home, you’ve learned to address the noise and double-check fit and cleanliness for lasting quiet.
Linking routine door checks to other seasonal maintenance keeps surprises in check. Preventive habits not only solve squeaks but support the overall health and comfort of your living space.
Now you’re prepared for any squeaky door with proven methods and a sharp ear. Keep your home peaceful and respond confidently to every creak or grind as it appears.
Frequently Asked Questions
- What household item works fastest for a squeaky door fix?
Cooking oil delivers quick relief when dabbed on the hinge. Its easy application and wide availability make it a first-choice solution for most light-metal squeaks at home. - Is petroleum jelly safe for all door hinges?
Petroleum jelly applies safely on most metal hinges and maintains lubrication for months. Avoid applying to painted wood, as oiliness may stain exposed surfaces over time. Test a small spot first. - Can candle wax treat every type of squeaky hinge?
Uncolored, unscented candle wax is best. It provides a temporary fix and is most effective in dry climates on interior doors, where temperature shifts are minimal and the wax remains stable. - Should I remove the hinge pin to fix tough squeaks?
Pin removal gives deeper access for lubrication but isn’t required for basic fixes. If normal surface treatments fail, carefully extracting the pin for complete cleaning and greasing is recommended. - How often should I inspect door hinges to avoid squeaks?
Twice-yearly checks and lubrication keep squeaky door fix needs minimal. Regular wiping, adjusting, and listening for early complaints can cut problems before they disrupt your home life.

Quick Tile Grout Repair Without Full Re-Tiling
Fix cracked grout fast! Learn how to repair tile grout without re-tiling for a fresh, durable finish. Read on and learn more!

