Behind-Radiator Dust and Grime Deep Clean: Achieve a Spotless Space
Pulling your radiator from the wall can reveal a world of hidden dust and grime. Discovering these messy areas often spurs the need for a radiator deep cleaning unlike anything else.
Hidden dust behind radiators causes allergies to flare, worsens air quality, and leaves homes less inviting. Addressing these spots keeps your living space healthier and surfaces looking fresh.
Ready to lift the veil on hidden grime? Explore this radiator deep cleaning guide for practical solutions and step-by-step techniques you can use immediately to transform your environment.
Tackling Radiator Grime: Quick Results for Every Room
Aiming for reliable results ensures every radiator deep cleaning session transforms not only your radiator but the entire atmosphere of your room.
Every pass of a cloth or vacuum clears stubborn dust, boosts your indoor air, and creates a visible difference you’ll see and breathe.
Choosing Tools Strategically for Radiator Deep Cleaning
Grabbing a slim vacuum nozzle pairs well with microfiber dusters. Use these together to reach tight spaces, lift dust, and avoid just swirling it around.
Pairing a sturdy radiator brush with an absorbent cloth removes deep-set grime while preventing scratches on painted or metal surfaces—a step many overlook for effective radiator deep cleaning.
Avoid over-wetting your cleaning cloths. Damp, not dripping, works best. Use gentle circular motions, checking under fins and between panels, for consistent results across different radiator styles.
Step-by-Step: Sequence for Maximum Deep Clean Effect
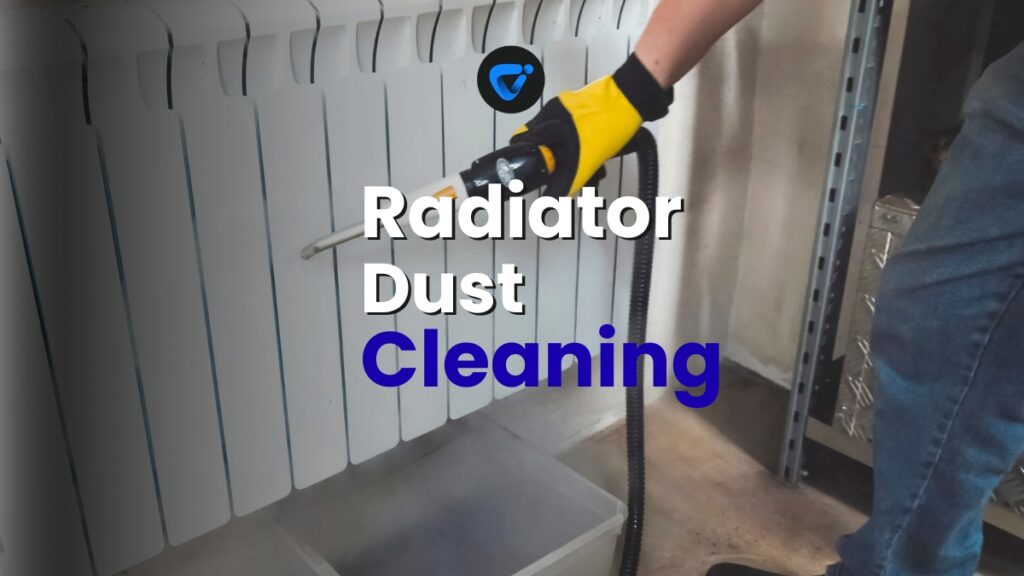
Begin by shutting off your radiator, ensuring the surface cools. Unplug electric models. Lay towels beneath to intercept dust and drips before starting the radiator deep cleaning process.
Using your vacuum with a crevice tool, sweep under and behind. Follow up with a radiator cleaning brush, pulling dust down. Collect debris from the towel instead of letting it scatter elsewhere.
For tough grime, apply a lightly-soapy sponge to stubborn spots. Dry surfaces thoroughly before restoring heat, avoiding corrosion and residual dampness—a best practice for every radiator deep cleaning session.
| Tool | Primary Use | Pros | Takeaway Use |
|---|---|---|---|
| Microfiber Cloth | Surface dusting | Reusable, gentle | Wipe panels and grilles |
| Vacuum (Crevice Tool) | Loose dust | Effective reach | Clean tight gaps |
| Radiator Brush | Under fins | Flexible, thorough | Push out hidden debris |
| Sponge | Spot cleaning | Absorbent, targeted | Lift grime clusters |
| Towel/Drop Cloth | Floor catch | Protects floors | Collect drips/dust |
Chemical-Free Cleaning Methods Deliver Reliable Results
Achieving a cleaner radiator without harsh chemicals protects your family, your pets, and your indoor air quality—the perfect solution for households that value safety alongside effectiveness.
Leverage steam, gentle soap, and basic supplies to complete a deep clean that’s friendly both to skin and surfaces, yet powerful against grime, all in your next radiator deep cleaning session.
Using Steam Cleaning for Hidden Radiator Space
Fill a handheld steam cleaner with distilled water and direct steam into radiator fins. The heat loosens grime and dust, making it easy to wipe away with minimal effort after cooling.
Steam cleaning works especially well on tough buildup, releasing sticky particles found near kitchen radiators or behind units exposed to cooking vapor or smoke particles.
- Position the steamer’s nozzle at an angle for access between radiator fins. This ensures even hidden spaces benefit from the radiator deep cleaning process.
- Limit exposure time to 5–10 seconds per area to avoid metal warping, then allow the radiator to cool before touching for wiping.
- Dry with a microfiber towel after every spurt of steam to deter water spots, preventing streaks on painted or metal radiator surfaces.
- Repeat a second steam pass for persistent greasy buildup—visible when you feel surface stickiness on your fingertips even after wiping once.
- Store steamers out of direct sunlight and rinse internal tanks after use for longevity; safety and ongoing reliability matter for weekly radiator deep cleaning.
If you don’t own a steamer, a tightly-wrung cloth with hot water and a few drops of mild dish soap works well, too.
Baking Soda and Vinegar: Old Standbys with Modern Effects
Mix one tablespoon of baking soda with warm water for a gently abrasive paste. Apply the mixture to stubborn spots and let it sit for five minutes before wiping clean.
For mineral stains or sticky residues, dab a vinegar-soaked cloth, pressing gently on affected zones. This lifts mineral spots left by steam or leaks without damaging the radiator’s paint or finish.
- Test pastes on a hidden spot first to rule out finish damage before proceeding with a full-scale radiator deep cleaning treatment on visible surfaces.
- Never mix vinegar with bleach—this combo gives off hazardous fumes and doesn’t enhance cleaning power.
- Baking soda can neutralize lingering radiator odors, making the room instantly fresher as part of your weekly routine.
- Use gloves with vinegar to avoid skin dryness, particularly for sensitive skin types or those cleaning frequently.
- Finish by rinsing all surfaces with a clean, damp microfiber, and then thoroughly drying to prevent water spots.
Natural methods maintain surface integrity while removing layers of dust and stains that build up quietly over time.
Preventing Reaccumulation: Rules for Ongoing Cleanliness
Establishing new habits ensures your radiator deep cleaning efforts have a long-lasting effect, meaning you’ll spend less time fighting thick dust layers in the future.
Proactively managing airflow, dust sources, and household routines plays a key role in ongoing cleanliness, helping your radiator deep cleaning results last several weeks or even longer.
Boosting Air Circulation to Limit Dust Cling
Opening windows daily, even briefly, dilutes airborne dust—especially helpful if you live in a dry or static-prone region where dust quickly clings to warm radiator surfaces.
Run ceiling or portable fans during major cleaning sessions. Point airflow across, not directly at, radiators; this sweeps loose particles away and complements every radiator deep cleaning cycle you perform.
After vacuuming, pause before switching the radiator back on. Allow 10–15 minutes for residual dust to settle or be removed from the air by a purifier or fan.
Weekly Mini-Routines that Sustain Larger Successes
Designate one day a week for a five-minute swipe—dust, vacuum, wipe with a damp microfiber. This investment pays off, preventing major buildup and making subsequent radiator deep cleaning fast and simple.
Use a sticky lint roller between full cleanings to grab hair and lint that brushes and vacuums miss. Tuck a roller in your regular cleaning kit for quick, impromptu maintenance.
Encourage family members to keep clothes and storage bins away from radiators. Clutter blocks air movement and speeds up dust buildup, undermining your efforts between deeper cleaning sessions.
Detecting and Managing Tricky Grime Zones
Knowing where grime hides helps you target the right areas. Cracks, fins, and seams trap particles that regular dusting rarely touches, calling for focused radiator deep cleaning methods.
Noticing Visual Cues for Deep Buildup
Gray shadows under radiator pipes, yellow-brown smears on lower panels, or thick, uneven dust in corners all highlight where dirt accumulates faster than other spots.
Loose paint patches sometimes signal hidden moisture from blocked airflow or condensation. Address these areas promptly in each radiator deep cleaning routine to prevent structural issues.
Run fingertips along grooves; a gritty, slippery feel means oils, not just dust, need removal. Target these ‘hotspots’ before they turn stubborn and spread grime further.
Timing Your Cleaning for Maximum Effect
Cleansing radiators at the start of each season, especially before heating or cooling cycles, halts dust from baking onto surfaces and undoing previous effort.
Deep cleaning after sanding, painting, or renovations clears heavy debris that regular routines can’t address. Schedule a special radiator deep cleaning right after major projects for best results.
If you’re hosting or prepping for allergy-sensitive guests, a radiator deep cleaning 48 hours in advance ensures fresh air and a spotless look without residual dampness.
Creating a Radiator Cleaning Kit That Works Every Time
A dedicated cleaning kit means you’ll be ready to dive into radiator deep cleaning anytime—no scrambling for missing items or piecing together subpar substitutes from your laundry shelf.
Assemble tools based on the table above, then store your kit in a labeled bin somewhere accessible. Link this kit to your regular cleaning routine for efficiency.
Sample Kit Ingredients and Their Purpose
Your kit should include a microfiber cloth, a flexible radiator brush, a crevice-vacuum tool, a natural sponge, and a bottle for DIY vinegar solution. Each item supports specific cleaning actions.
Include gloves to protect your hands, rubber bands to bundle cloths, and a marker to label when cleaners expire. Simple details keep every radiator deep cleaning straightforward and safe.
Replace items that wear down—fraying cloths, misshapen brushes, or expired detergents. Your kit’s reliability saves time and ensures every session is equally effective, start to finish.
Conclusion: Radiator Deep Cleaning Benefits That Last
Stepping up your behind-radiator dust and grime routine brings visible, refreshing changes. Cleaner radiators mean improved air quality, lasting neatness, and real pride in your living spaces.
Building these radiator deep cleaning habits promotes a home where every surface is respected, cared for, and inviting—making daily comfort something you notice, not just assume.
Commit to regular radiator deep cleaning and watch once-hidden grime disappear. You’ll enjoy healthier air, lower stress, and a welcome sparkle in every room you maintain.

Quick Daily Bedroom Reset in Under 15 Minutes
Transform your space fast! Follow this 15-minute daily bedroom reset to keep things tidy, calm, and clutter-free.